


Guess what? It's linky party time at Wood You Like to Craft!!!

Were you inspired by Candace and Nicole's toolbox planter?

Or maybe Krystal's...
How about Melinda's?

Or maybe even one of mine?
If so, be sure to jump on over to Crafty Sisters and share, share, share!
You have until this Friday to link up.
Prizes will be announced on Sunday as well as a sneak peak of my June project.
(you can find the party rules on the post)
Until then, here's my post with the two version's of the toolbox I shared...
Hey all you fantastically crafty people out there!
It's Wendy from Craft Goodies here for a little WYLTC? action.
I'm having so much fun with this group-it's become one of my favorite excuses to create something.
I do have to agree with Krystal, this is causing me to push my creative side a bit harder than usual but the results are so satisfying. I feel like I have my own little team of inspirational guru's to play with.
I love this week, it's kind of like opening a new present every day.
While we get a sneak peak of the main project ahead of time, we don't see each others versions until they post during the reveal week.
It is so fun to see what we've each done with someone else's idea.
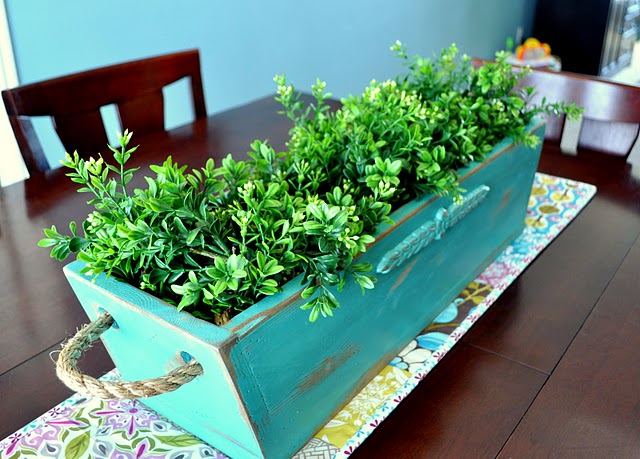
My (second) version of Candace and Nicole's toolbox planter looks a bit like this...

...teal might be the color of the week?
I really had a hard time with this.
Not because the design was difficult, but because the more I thought about how to alter the original, the more I realized I really liked the original!
{The tulips totally put me over the top! My faves!}
I originally made one really similar to Candace and Nicole's to use as a centerpiece for a church dinner...
it was a big hit!

I opted for a shorter and wider rectangle to accommodate the potted plant I was using, the dowel handle, and a slatted bottom. The wood I used is a 1x6 that I found lost and alone in a field, I loved it immediately. It was beat up, cracked and aged by the sun, in other words perfect for the theme of our dinner.
I had to work the ends a bit as I only had the one piece of wood, kind of like wood "cut and paste".
But I like it! And it now has a permanent place on my front porch.
The second box came about from an after-ball games dinner at Sonic.
Have you ever really checked out the drink carriers? Total inspiration!

I used a pine 1x6 and 1x12 for the sides, center handle, and dividers,
and 1/4 inch MDF for the bottom piece.
I started by cutting and sanding all the pieces then I nailed and glued the box together. Re-sanded a bit, added a little putty to the corners, sanded again and then got to painting.
I used Val-spar Mediterranean Blue (Lowe's).
Then I beat it up a bit with a flat-head screwdriver and the power sander.
Wiped it clean, applied the stencils, painted in the stencils with Krylon Gloss Black, sanded one last time, then applied a layer of dark walnut stain and a sealer.
WHEW-toolbox done!

I knew I wanted this to be an "Art Toolbox" that my girls could keep in their room so I gave them each a side of the box, designated by the monogram, and filled it up with markers, crayons, paper, pencils and such. They love it!

I obviously LOVE this month's project. So much fun and (clearly) many uses at my house. Just might find myself building a few more...
Candace, Nicole, thanks for a great starting place!
Happy Crafting!


2 comments:
Oh, this is so so cute! I just love it...fantastic idea! :)
www.iheartmygluegun.com
Wendy, this turned out beautiful! Linking this up with us made the Creative Bloggers' Party & Hop better and more special. Thank you!
Post a Comment