Hi there! And welcome to Craft Goodies. I'm thrilled that you've stopped by and hope you find something here that makes your visit a great one...
Showing posts with label clothing. Show all posts

Thursday, May 26, 2011

School's Out! Jean Bulletin Board...

So it's the end of the school year and I have found myself surrounded in well worn-no knees remaining and too small jeans.
I salvaged what I could into shorts for the summer-(I have a great hemming trick I need to share with you!) but still had a few odds and ends left over. I'm having issues with tossing things out that I know I could use for something so I had to find a use for these little critters.
 
 
I found it!
I cut and sewed the remaining pieces together to form a patchwork wonderland of denim.
I made a point to keep the pockets so they could be used to tuck notes or pictures into.
 
To make the board (I'm going backwards, sorry and I have no pictures. Wasn't thinking there!) I covered a 3 ft x 3 ft piece of plywood with foam-core poster board. I used two pieces and had to cut them a it to fit the board completely. I glued the foam core into place with wood glue.
 
Then I covered the dry foam-covered board with the fabric piece, attaching it to the back of the board with the staple gun and duct tape!
 
From there it could have been done, it looked great. But I have a tall skinny wall to cover and wanted it to take up a bit more space so I built a frame out of 1x3's and added a 6 inch wide shelf across the bottom.
It looks awesome in my daughter's room and she is thrilled to have a "cool" bulletin board.
 
A few after thoughts here-
you could easily do this with a store bought bulletin board. Either pop off the frame, cover the board, and then re-frame it. Or just cover the whole thing using your good friend the duct tape to keep it all in place.
 
The pockets are super fun! They are great to hold a pen, extra cash, or a love note from mom. Good choice to use them.
All the buttons and zippers were a pain to sew around but they add so much to the overall look of the board I'm glad I kept them.
I also made a point to keep some of the patches on the knees-these were my daughters favorite pants, and the patches helped her to recognize them and know in a way she still had them! (She's a total sap-just like her mom!)
 
Overall-a fun project to use up the no longer wearable jeans and a super cute functioning bulletin board.
 
 
Happy Crafting!!!

Thursday, January 27, 2011

More Threads and Thrills...Rolled Rosette Pillow

*** 9/09/2012 I just received a comment on this post that I can't decide if they were joking or not. It was kind of mean, but either way, they asked that I let you know that this project isn't quick. It took me several hours to complete one pillow so if you need to have this done in an hour here you go...it's not going to happen, sorry. But then too, I did mention that in this post. I removed the comment, it makes me sad, hopefully your pillow will make you happy!***

I've been pining for pillows lately, today I finally got around to making a few. I am elated and tickled pink with them, so much so, I feel the need to share the story of their creation...

In my efforts to come up with a few examples for my Valentine exchange, I found myself at my local Goodwill. I gathered a few fantastic treasures and headed to the register to pay. Then an odd and super terrific thing happened...
The cashier wrapped all of the glass items I purchased in white t-shirts!
What? Seriously? So much better than old newspaper! 


I got home, unwrapped everything, and sat staring at a pile of white t-shirts. I felt super guilty at the thought of tossing them, but what to do?
Then the light bulb started glowing. I ran across a beautiful pillow last week that was covered in crocheted flowers-I wanted one badly.
Two problems though, one the pillow was $70 and  two, I don't crochet.
I thought I had solved the problem by resolving to make the flowers from ribbon, would have worked but would require A LOT of ribbon. So what if I cut up the t-shirts instead?
OH YEAH!
Thank you Goodwill lady!


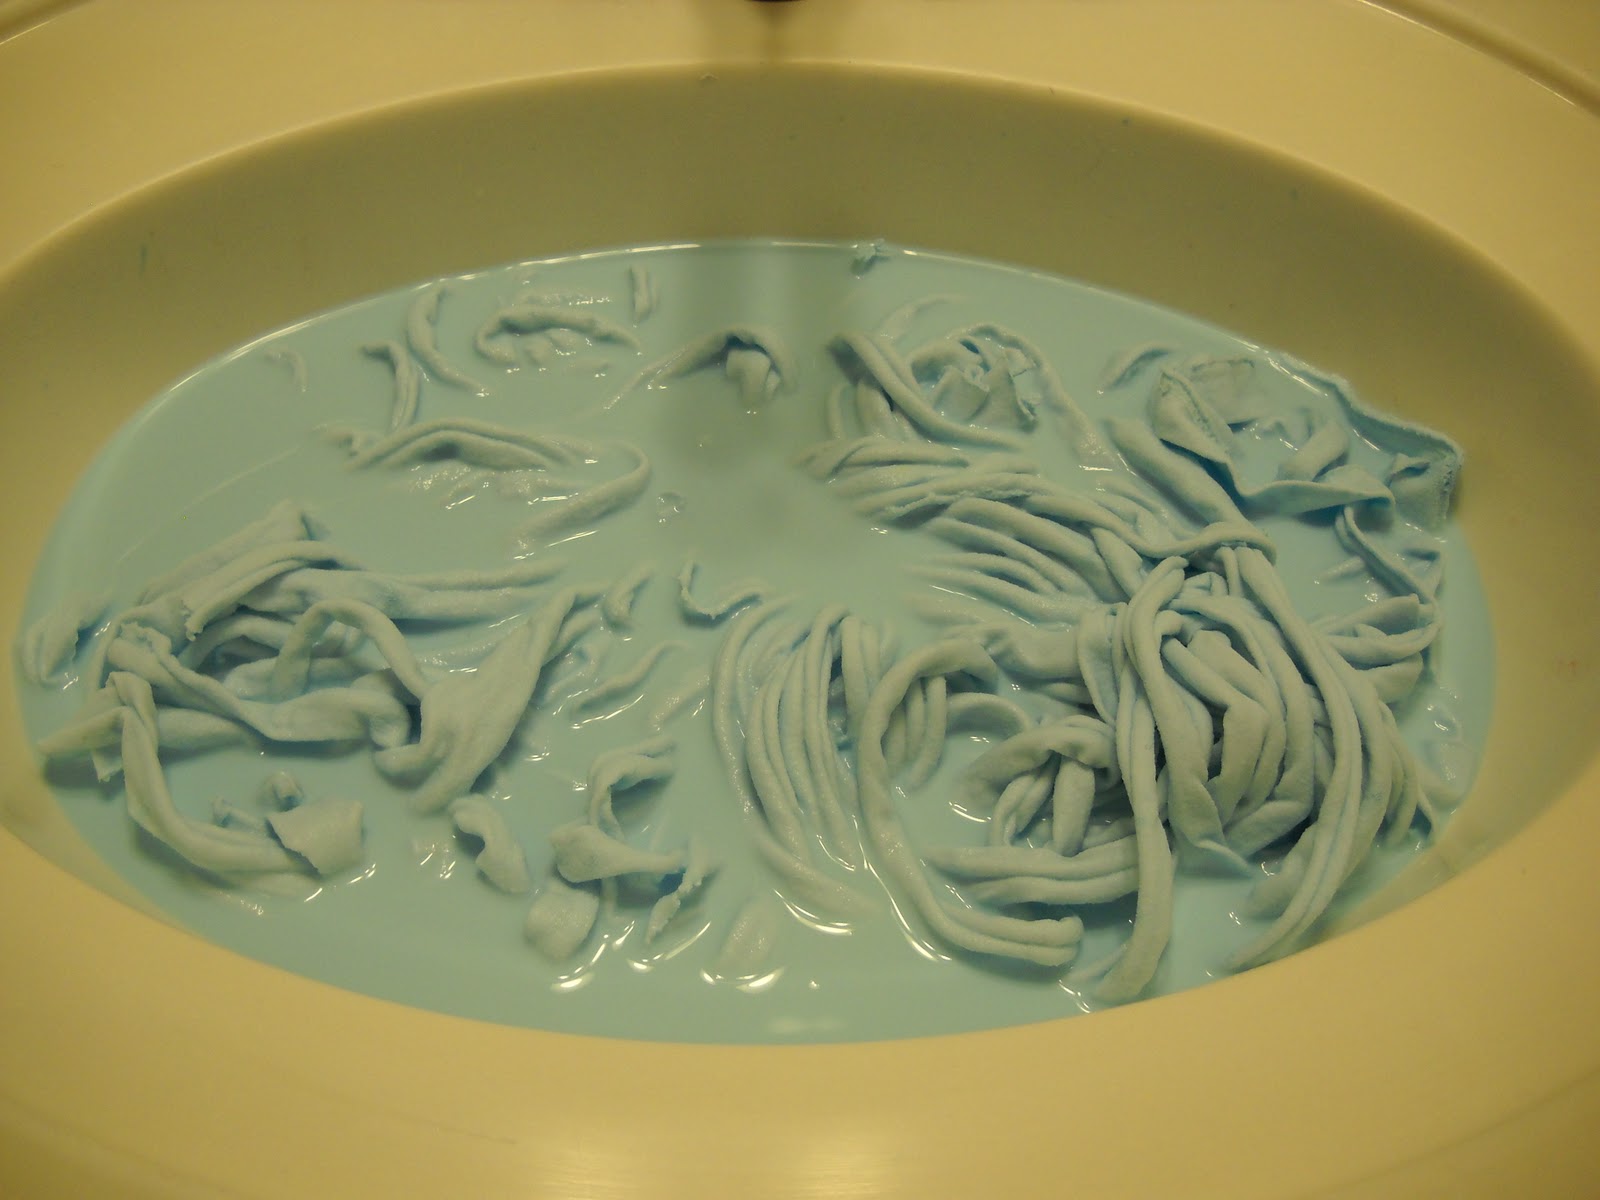
 I tore the t-shirts into long strips about 1 1/2 inches wide. The nice part was because I tore instead of cut, the edges rolled on their own, saving me a ton of time.
I gave the strips a bath in a mix of warm water and baby blue paint.
{I knew this would last due to the countless #of shirts I've ruined while painting}

 I rinsed the strips out, gave them a twist to remove the water and threw them into the dryer.
Then I started rolling, and rolling, and then rolling a little more. Once I had the flowers rolled and stuck together, I sewed them onto a pillow square.
And ta-da...
...my baby was finished!
Just in case you're wondering, I used approx. 60 rosettes per side for 3 pillows, and I used 12" pillow forms.
The ironic part, I was trying desperately to finish these to enter them in a contest. They took a bit longer
(like several hours...) than I thought they would, and I missed the link!
But that's okay cause these babies rock!
And thanks to the awesome Goodwill  lady, only cost me the price of the pillow forms...

Happy Crafting!


I've linked this post to these great sites:
My Romantic Home
Someday Crafts
Tatertots and Jello
Bubbly Nature Creations
Fast Daze
I {HEART} Naptime


Thursday, January 13, 2011

Threads & Thrills Thursday...FaveCrafts.com

 
Haven't had any time to sew.
Haven't had time to search out that great new super trendy thing-then I opened my inbox...
TA DA! Inspiration!
Have you heard of FaveCrafts.com?
Forgive me for sounding like a salesman here, but it really is a fantastic little tool when your creative juices are running low. 
I was turned on to this little gem by Abby from A Feathered Nest over a year ago.
 {And I'm SO glad she did.}
So what is it? It's a website chock full of AMAZING craft ideas. Everything from playing with clay to crocheting an entire wardrobe, and everything in between-all with the tutorials and patterns included!
If you're a needle wielding kinds gal, this might be your heaven.
My favorite part is the newsletter you can sign up for-great ideas right in your inbox.
Here's a few pictures of what was there this morning...
 
this came from a post titled 29 ways to up-cycle a t-shirt...
 
 not only can you get instructions for the afghan, you can get the template for the throw too!
 
 
how hip are funky scarves right now? this came from another 29+ways...post.

They really do have a bit of everything, even a blog! If you like your inspiration delivered to you, it might be worth a look, if not, hope you enjoy the pictures!

Happy Crafting!


Saturday, January 1, 2011

$2 Dresses and a Purpose

I really haven't been doing nothing over the holiday break, just not as much as I probably should...I have it in my head that when my girls are on break, so too am I. I think it comes from so many years of teaching, but they head back to school Tuesday and I'm back to getting ready.
 
I wanted to share a few things with you this weekend. First, these {pillowcase}dresses...
 
I love the simplicity and look of these and have wanted to make some forever.
These were supposed to be done for Christmas, but they became New Year dresses instead, whoops!
 I used the term "pillowcases" lightly because I used the pattern behind a pillowcase dress but used bandannas to make them instead of pillowcases.
I found such a fun selection of them for a dollar piece!{HobbyLobby and Wal-mart} 
Making each dress only $2!
I had all the ribbon so I didn't factor that it to the cost.

Look past the road rash on her chin-bad collision with a chair!
So cute, seriously SO easy. 5 seams total. That's it. I totally winged the first one, and then got nervous if I'd done the ties right. I found these 2 tutorials that helped.

To bad they don't make bandannas in mommy sizes!

On to the second part of this post, a purpose!
I was having a bit of a panicked moment the other day about this blog. I'd lost a follower, yes 1 person out there made a choice that set my mind plummeting into "I can't do this, I've let someone down" land. Just part of who I am, little things stick with me forever.
{So trust me when I say your sweet comments mean the world to me!}
Long story short, I happened across a fantastic post by Ashley over at Little Miss Momma
that brought it all back to me, this is what she wrote:
"WHY: Why did you start this blog? Was it to make money, to make friends, to share ideas, to promote your business, to vent, or to tell your stories. Now, write down your reason {and be specific}--because there will come a day a few months down the road when you will forget why you ever started this whole blogging thingy--you will lose sight of your original vision, your original plan, your reason for doing this in the first place--and on that day you will go back and read what you wrote down today, and you will remember why this is important to you. Let your "reason" be the guiding force behind your blog content--don't lose sight of what's important to you, or your readers will know, and they will stop reading."

It was exactly what I needed. So I am sharing with you the why's behind Craft Goodies, so when something silly or awful happens again, I'll know where to go to get over it...

I had two reasons in starting this blog, one WAY more important to me than the other.
I had planned on opening an etsy shop but wanted a way to show some of the possibilities of what you could do with what I was selling so a "craft blog" made sense. A fun way to help promote my little store and to give me a place to share all things crafty.

But the second reason, for me, was the more important. We had recently moved from a wonderful, small town in Washington state to a wonderful, not so small town in southern Texas. And as fantastic as College Station and the people here were and are, it wasn't home, and they weren't the friends I had left. I felt so lonely. So alone.
I needed friends, I needed people that counted on me to do something, and I needed people to appreciate me and what I could do.
So out of all that, this little blog was born. It gives me something to do, and gives me a way to feel important. I was thrilled when I hit 10 followers! Ten ladies thought I was worth their time, and they would leave me comments, so I had someone to talk to! It was working, I was making friends.
 My heart swells every time I see that my follower counter has grown, not because I want a million followers, but because it means someone out there thought enough of me to place me in their day.

So there it is, my purpose in blogging is a need of friendship and a fun way to share each other and the things we create with a bit of business on the side.
I do truly appreciate all of you that stop by to see what's going on, and I  LOVE it when you leave comments or send me an email. It makes my day to hear from you!
On that note, I have plans in the works to start featuring more of you and your ideas-I have learned there is no way I can do this alone!
I'll end this monster post by saying Thank You for sticking with me this far. I'm excited for the year to come!
Happy Crafting... 
 

Tuesday, December 21, 2010

Ruffled Christmas Tee

Need a super cute last minute gift or party outfit for a little one? Give this a try...
 
[178_0600[5].jpg]
 
Find a fantastic tutorial over at Stuff by Ash. So cute, and the perfect way to use those few extra tee shirts I have left from my pj project!
Amazing idea Ashley-thanks for sharing!!!
 
Happy Crafting... 

Friday, December 17, 2010

Christmas PJ's...

 
Christmas Pj's are a favorite tradition at our house. We each get a new pair every Christmas Eve. Because the girls know they are coming,we try to spice it up a bit with a treasure hunt to find them and a
PJ Fashion Show afterwards.
 
 As my girls are pretty close in age, I'm a sucker for all things matching. My oldest however, is not. This year she won and I bought them all fun jammy pants and crazy holiday socks.
 Still feeling the need for some holiday unity my heart skipped a beat or two when I saw this...
 
The same but different-the answer I needed!
Sarah over at Harrigan Howdy put together a great tutorial on how she and her mom whipped up these super cute pj's. She even shared a link to a free jammy pant pattern if you're feeling like sewing!
 
Here's my little snowman all ready for wrapping and a fun and festive Christmas weekend...
{I was able to use the same piece of freezer paper for all 5 shirts! Big surprise, bigger relief!}
 
 
Thanks Sarah for the inspiration and Happy Crafting to you all!
  

Thursday, November 25, 2010

New Line Give away & Etsy Shop Coupon! {CLOSED}

I am so thrilled to have my new line ready to go, I've been working on perfecting it for a while. I am in fact, so excited about it, I want to share it with as many people as I can.
I am going to give away...
 
1
Baker's Delight set,
{in the color of MY choice}


1 Wood Cookie set,
and 1 Wood Sandwich set!


Want to win one, here's what I need you to do...

Entry 1: Be sure you're a follower of my blog,
leave me a comment to tell me if your new here. Leave me a comment if you've been getting the goodies for a while. But you have to be a follower!
Entry 2: Share this post, share my blog,
share my Esty store, just share, share, share! Then leave me a comment on this post to let me know where you shared.
Entry 3: Place an order from me any time this weekend {11/25-11/29}
either through my Etsy Shop or here through my blog and
get an extra chance at FREE GOODIES!
{Use coupon code GREATGOODIES during Etsy checkout for 15% off your ENTIRE order! That's on top of the BUY 3 Get one kit FREE promo!}
 *Free item is lowest costing product and does not apply to group priced items*

I'll announce the winners on Tuesday!

Thursday, October 21, 2010

T-shirt to Shrug

Did you happen to catch this tutorial from Brassy Apple a while back on U-Create? I absolutely fell in love with it and immediately started searching for the perfect t-shirt to cut apart. My girls are super big into the graphic tees theses days so I was having a hard time finding one I was willing to sacrifice, until today that is!

The school 3 of my girls attend sent home very cute school t-shirts a few weeks ago. The only problem was that the smallest size they had was a 6-8, my 4 yr old swims in a 4T! My first thought was to turn it into a dress, needless to say, life happened and that didn't. Today was her field trip to the pumpkin  patch and they were supposed to wear these shirts. I put it on her and looked at her drowning in knit and remembered this fantastic tutorial!

Because it is her "school shirt" I didn't want to cut it completely apart. Instead, I cut it across the back just below the bottom of her rib cage{didn't want to cut off any of those generous sponsors!}, still made the tails in front, but only cut them half way up the front so I could tie them in a knot.


 It was still short enough to wear as a shrug over a tank top, and still left the name of the school in tact. The fabric rolls back on itself so there is NO SEWING. And, she is no longer looking like she wore her nightgown to school.  


 My little "Pumpkins" were adorable in there matching hair roses made from the extra fabric. I cut various sized circles, stacked them on top of each other biggest to smallest and stitched them together adding a button on top. I glued two onto aligator clips. Stitched the third onto and elastic band.                                                                      


Awesome tutorial, amazing idea! Really quick and easy-we got so many compliments on it and how cute it was. So go, find a t-shirt and start cutting.


Related Posts Plugin for WordPress, Blogger...