Hi there! And welcome to Craft Goodies. I'm thrilled that you've stopped by and hope you find something here that makes your visit a great one...
Showing posts with label pillows. Show all posts

Tuesday, April 10, 2012

It's Pillow Week over at the CSI Project!!!

If you didn't get a chance to visit the CSI Project last week for my guest post, no worries!
Here it is:


Hey there all you CSI friends!
It's been a while since I've been here and I could not be happier to be back. My name is Wendy and most days, I can be found over at my little place in cyberspace:
 Craft Goodies.
Craft Goodies
So why am I so happy to be here this week?
One, I LOVE this blog--so many fantastic ideas to be found and two, I LOVE pillows!!!
I love that they are so versatile, such an easy way to spice up a plain old chair or sofa, and can be anything from wild and crazy to completely personal. SO, let's get busy and make one!

I spied a pillow a few weeks ago at Hobby Lobby that I immediately wanted, I just didn't want to pay the $35 dollars for it so I set out to copy it.
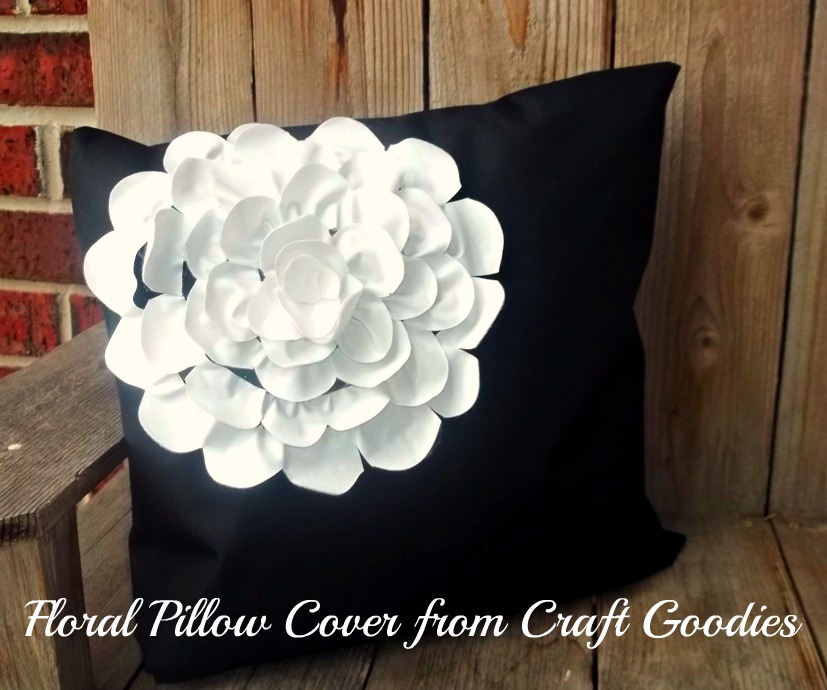
I couldn't be happier with how it came out.
{And it was so much less expensive to make.}
The key to making this pillow a stand out is to not use prints. The ones in the store were all solid, bright colors like hot pink, turquoise, lime green, etc, and then were paired with either a bright white or black flower.
Start with the pillow form size of your choice, your cover fabric, and contrasting flower fabric.
The pillows in the store used a suede type fabric for the flowers, because mine are going outside I chose felt-backed vinyl. I probably would have used this if I were using these inside anyway. It "puckered" just like the suede, will be super easy to wipe clean, and I don't have to worry about the edges fraying.
My cover fabric is also outdoor fabric so it won't fade or mold if it gets wet. Home decor fabric would make a good choice too.

I used an envelope style pillow case to cover the form. These are fast and easy, and make it super quick to change out your pillows.
You can find a good video tutorial on how to make one HERE.

**I measured and pinned out my casing, but didn't sew it together until the flower was on. This made it easier to sew the flower on without having to try and avoid sewing my pillow case shut!**

To make the flower cut the vinyl into 2 inch wide strips.
 {I used a total of 3, so you don't need much fabric at all...}

Once you have your strips, go back and add a scalloped edge to each of them.

Pinning comes next. I used a soup bowl to give me a starting point. I pinned around the bowl really loosely, about every other petal. 

Continue to spiral the petals toward the center, pinning as you go. the go back and sew the petals into place, catching the "puckers" as you go. 

See the gaps between each layer? This made it super easy get in between each layer with my sewing machine. I used the machine to sew everything but the last two petals, they got fabric glue.

From there I finished up the envelope casing, stuffed in my form and sat back and smiled!

All in all, a yard of each fabric was enough to make two 14x14 casings and oodles and gobs of flowers--a 1/4 yd of vinyl would have been plenty.

I hope you like it as much as I do, and will give it a try. I can't wait to see all the submissions that come in this week, it's sure to be a mega-source of ideas and things to try!

And thanks too for letting me stop by today. It's always such a treat.
Happy Crafting.


Wednesday, April 4, 2012

Out of the Office...But Still Crafting!!! Guest Posting at The CSI Project...

So clearly I can't read a calendar! My guest post actually went up today...sorry if I lead you astray, but it really is there now if you'd like to go check it out.

Today I'm over at the CSI Project sharing how I made this:

 It's Pillow week at CSI and I'm thrilled to be a part of it {and super excited to find a ton of new and fun ideas} so come on over and say hi!
Happy Crafting.


Friday, March 25, 2011

National Craft Month...at Kirstikoo!

I'm clearly not quite back to completely normal-or at least as close as I get.
 I mentioned the Simply Create contest going on over at Kirstikoo Thursday and forgot to share the link.
And well, it's probably a good thing cause I was wrong about the entry deadline.
YOU HAVE UNTIL TOMORROW!!!
Yeah for more time....
 
I'm also feeding a few selfish needs to post my entry...I want to play, there and here:
 

Visit thecsiproject.com


I happily introduce you to what used to be my curtains...


So this was my first time ever attempting pleats, I'm pretty sure it will also be my last!
Those buggers are NOT easy.
Funny thing though, after I got it all done and gave a pleased sigh of relief I pulled out the pleats and liked it even more. (Of course it would go that way!)

But no matter, I got it done and I like it.
And I gave the flower technique shared by Baby Bizzles on Tuesday a try-super easy, love how they came out.

And even better, I got an accidental bonus project out of my pleated efforts...
I measured my pillow wrong and ended up with my pleated (sewn!) fabric being to large.
I cut down to the correct size and ended up with a 3 inch strip of sewn pleats.
No way I was wasting all that effort!


 Now I have a super sassy pillow AND a flirty little headband...sometimes it pays to screw up!
Have a great weekend, I'm off to my first Texas Rodeo...Giddy Up Y'all!
Happy Crafting...

Thursday, March 3, 2011

Threads & Thrills Thursday...my list of must makes!

Remember a while back I told you about Favecrafts.com?
Well, I still love it. And I love getting their newsletter.
Look what it brought me today... 

Aren't those just about the cutest things ever?
I have 2 little girls that would go crazy for these.
These were designed by Maize Hutton.
You can find the tutorial HERE.

Ruffle & Rose Pillow Covers

 
Give me a second, I think my heart just stopped!
I ran across these beauties while flipping through the pages of my latest
PBTeen
So just YUMMY!!! I need several. You can check them out HERE
 
And last, I picked up the Spring issue of Quilts and More the other day
(purely for the hamburger pincushion on the cover! So stinkin' cute!!!)
 
And found a few other things I loved inside as well...
This one, they are giving away the patterns/instructions! HOOT! HOOT! for that...
 
You can download this project HERE
 
And this I just love, can't decide if  it's the ruffles or the colors but I know  I want one...
 

The pattern/instructions are in the magazine.
(Sorry, can't give this one to you)

So many beautiful things to want and make...share yours tomorrow during the
T.G.I.F.Thank GOODIES it's Friday linky party.
Happy Crafting!

Thursday, February 24, 2011

Threads & Thrills Thursday...

 
I have a super brilliant project going on, {at least in my mind it is super brilliant}, but I think I'm going to end up using it for my challenge entry in the OMTWI contest, so I can't share it...yet.
 
But I can tell you it requires a box for storage. I saw these last week and new it was the answer to my storage problem!
 
 Aren't they awesome? And hello, made from a diaper box, so super thrifty and genius.
Now while diapers are no longer a needed thing at my house {OOOOHHHH YEAH!!!!} I do visit Sam's Club enough to come across a good size box or two.
The boxes shown above come from
 http://www.positivelysplendid.com/2011/02/lets-make-something-together-lined.html.
She shares a fantastic tutorial, just click the link to find it. 
 
And just for a litttle variation, how about this cutie...
 Same idea, just super fun and sassy! Becky too shares the how-to's of this projects creation
over at Just Beckause.
{I love that she actually uses it to store her diapers! Much cuter than the cardboard box.}
 
And just because I LOVE THIS!!!and it's my blog so I can, check out this...
 
Now as I wipe the drool from my face I will tell you this comes via another of my favorite blogs
Oopsey-Daisy.
 Oh how I love this blog...and this pillow!
She has a link to the shop that supplied the fabric for this baby, {and a discount code!}
 
Go check out a few fun blogs, make a few projects, and get ready for tomorrow's linky party.
Happy Crafting!

Monday, January 31, 2011

Knock-Off Inspired Contest @ 733...

Ruffle Pillow from Pier 1
Kim over at seven thiry three is hosting a fun Knock-Off inspired contest. You have until Feb 11, to enter your best knock-off inspired project. Grab your project and head on over to enter. As I have pillows on the brain{still}, this is what I'm entering...


This fantastic little gem resides at Pier 1 for a mere $29.95, gorgeous but not what I want to spend on a pillow, especially when I need at least 4!


Praise be to the knock-off, here's the one I came up with, and at about $7.50 per pillow, it's like I  bought 1and got 3 for free!!!

I used a 12x12 pillow form and about 1 1/2-2 yds  of 100% cotton fabric, cut into 3x3 inch squares, per pillow. As these won't be used for anything other than looking at, I put them together with a lot of fabric glue. A dab in the middle of each square, and then pinched together to form the ruffles,  and then more glue on the form to hold the ruffle in place. I started in the center and worked my way out, tucking the new layers underneath the already established ones.
Be sure to check back on Wednesday to see what I made to match! It's big, and tall, and hangs on the wall...and I LOVE it! {And it was inspired by a paint sample pamphlet-another knock off of sorts!}


Happy {Knock-Off} Crafting! 

Thursday, January 27, 2011

More Threads and Thrills...Rolled Rosette Pillow

*** 9/09/2012 I just received a comment on this post that I can't decide if they were joking or not. It was kind of mean, but either way, they asked that I let you know that this project isn't quick. It took me several hours to complete one pillow so if you need to have this done in an hour here you go...it's not going to happen, sorry. But then too, I did mention that in this post. I removed the comment, it makes me sad, hopefully your pillow will make you happy!***

I've been pining for pillows lately, today I finally got around to making a few. I am elated and tickled pink with them, so much so, I feel the need to share the story of their creation...

In my efforts to come up with a few examples for my Valentine exchange, I found myself at my local Goodwill. I gathered a few fantastic treasures and headed to the register to pay. Then an odd and super terrific thing happened...
The cashier wrapped all of the glass items I purchased in white t-shirts!
What? Seriously? So much better than old newspaper! 


I got home, unwrapped everything, and sat staring at a pile of white t-shirts. I felt super guilty at the thought of tossing them, but what to do?
Then the light bulb started glowing. I ran across a beautiful pillow last week that was covered in crocheted flowers-I wanted one badly.
Two problems though, one the pillow was $70 and  two, I don't crochet.
I thought I had solved the problem by resolving to make the flowers from ribbon, would have worked but would require A LOT of ribbon. So what if I cut up the t-shirts instead?
OH YEAH!
Thank you Goodwill lady!


 I tore the t-shirts into long strips about 1 1/2 inches wide. The nice part was because I tore instead of cut, the edges rolled on their own, saving me a ton of time.
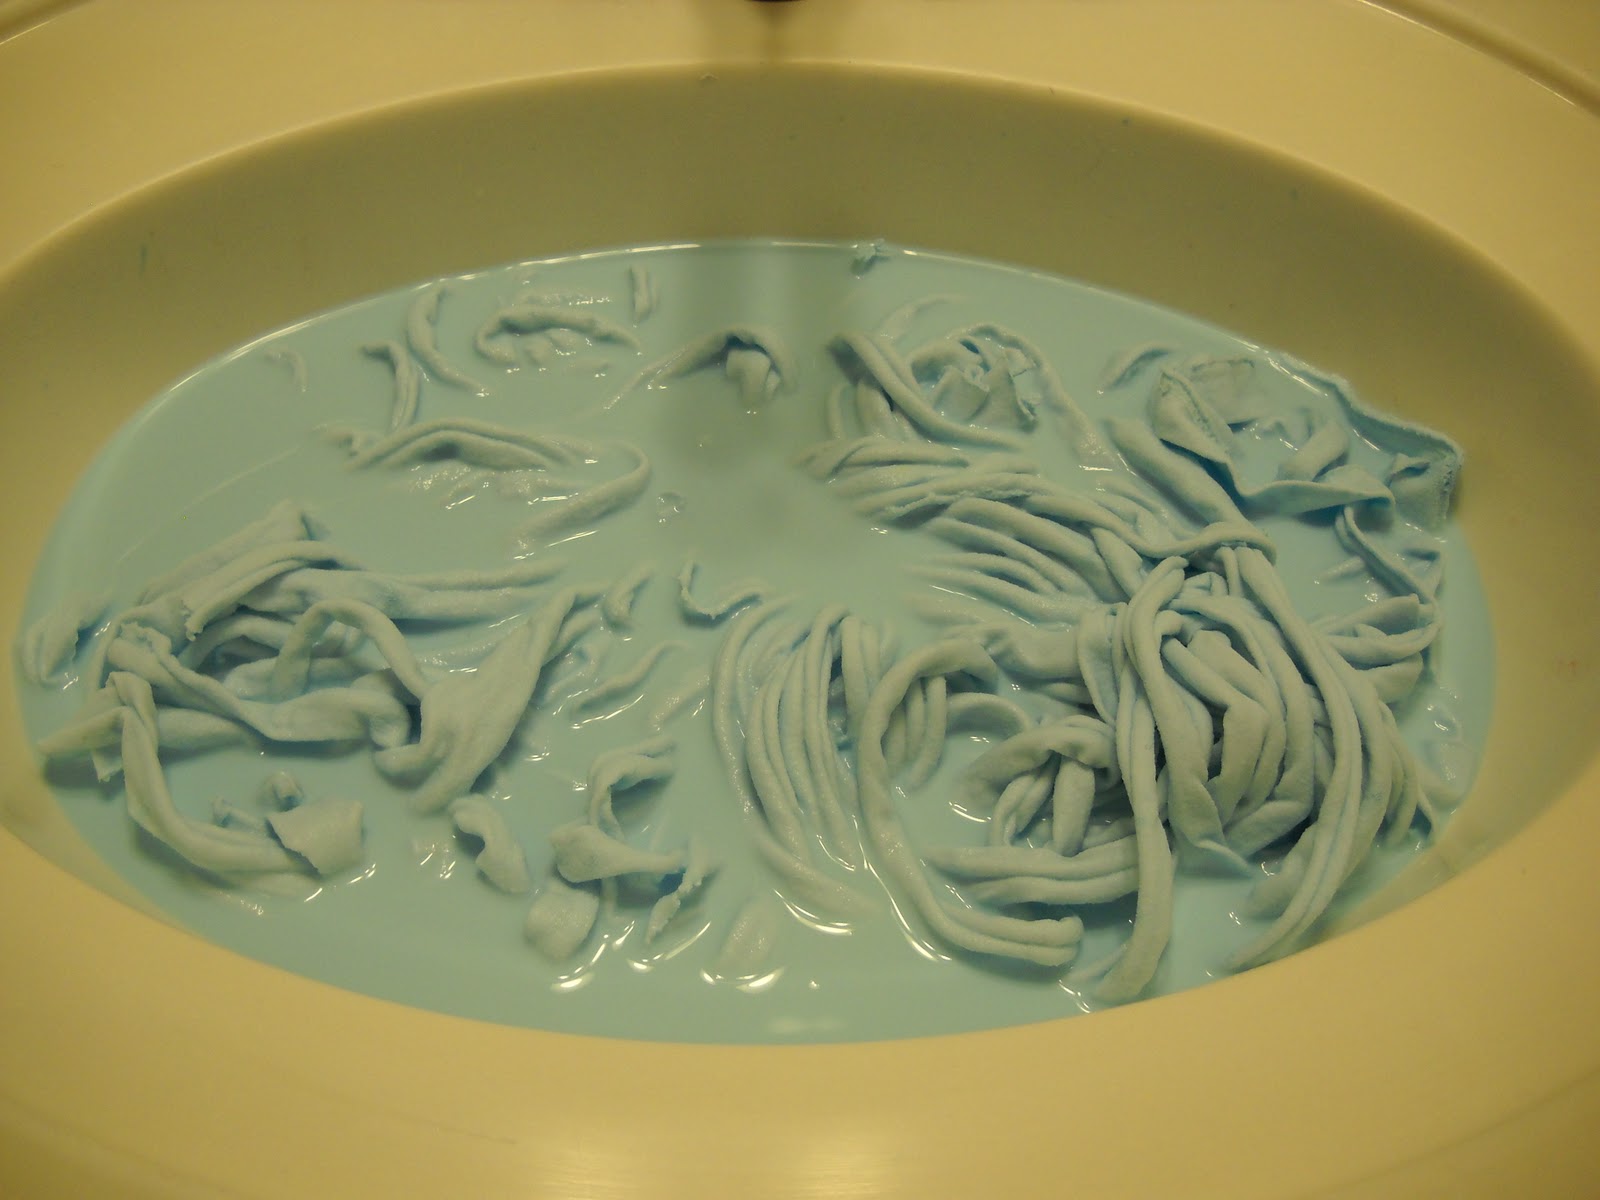
I gave the strips a bath in a mix of warm water and baby blue paint.
{I knew this would last due to the countless #of shirts I've ruined while painting}

 I rinsed the strips out, gave them a twist to remove the water and threw them into the dryer.
Then I started rolling, and rolling, and then rolling a little more. Once I had the flowers rolled and stuck together, I sewed them onto a pillow square.
And ta-da...
...my baby was finished!
Just in case you're wondering, I used approx. 60 rosettes per side for 3 pillows, and I used 12" pillow forms.
The ironic part, I was trying desperately to finish these to enter them in a contest. They took a bit longer
(like several hours...) than I thought they would, and I missed the link!
But that's okay cause these babies rock!
And thanks to the awesome Goodwill  lady, only cost me the price of the pillow forms...

Happy Crafting!


I've linked this post to these great sites:
My Romantic Home
Someday Crafts
Tatertots and Jello
Bubbly Nature Creations
Fast Daze
I {HEART} Naptime


Tuesday, January 11, 2011

Tuesday Treats featuring...YOU!

I wanted to send out a HUGE thank you to those of you who linked up your projects to my first
T.G.I.F.
{thank GOODIES it's Friday}
linky party.
You made my weekend so much better by helping me to reach and move beyond my goal, and I got to  visit some super projects and blogs along the way.
So thank you, thank you, thank you...
{Let's see if we can grow even bigger this weekend! Get your projects ready, the link will be up Friday.}
 
All of them amazing, here's a few of my favs in case you missed it...
 
Not just one, but two free printables...


 This super sweet and encouraging piece by
 Beckham and Bloom
{LOVE the color scheme!}


and this one! Perfect for a Valentine Craft from
While He was Napping
 
Feeding my need for pillows was this...


Is it to cheesy to say that I LOVE it!
You'll find the tutorial at Ameroonie Designs

And last, one 2x4 gal has to appreciate another...

This little gem made it's way  over from
and will soon appear on my book shelf!

Thanks again all!
Please, grab my featured button and do a little bragging, you deserve it!

Craft Goodies


Happy Crafting!

Thursday, January 6, 2011

Threads & Thrills Thursday...my need for pillows

I definitely have PILLOWS on the brain. I love how a bunch of fun colors, different textures, and sizes and shapes can make such a BIG statement. I have plans to {finally} get around to decorating this place I now call home. I’ve been stuck under a “NO PAINTING” clause in our lease contract that has had me scared to do anything-but no more! I am determined to bring color back to my world. And I’m starting with new throw pillows.{Brave, huh?}
I have an idea of what I want, but sure did peruse the net to find a few more ideas.
 Check out what I found…
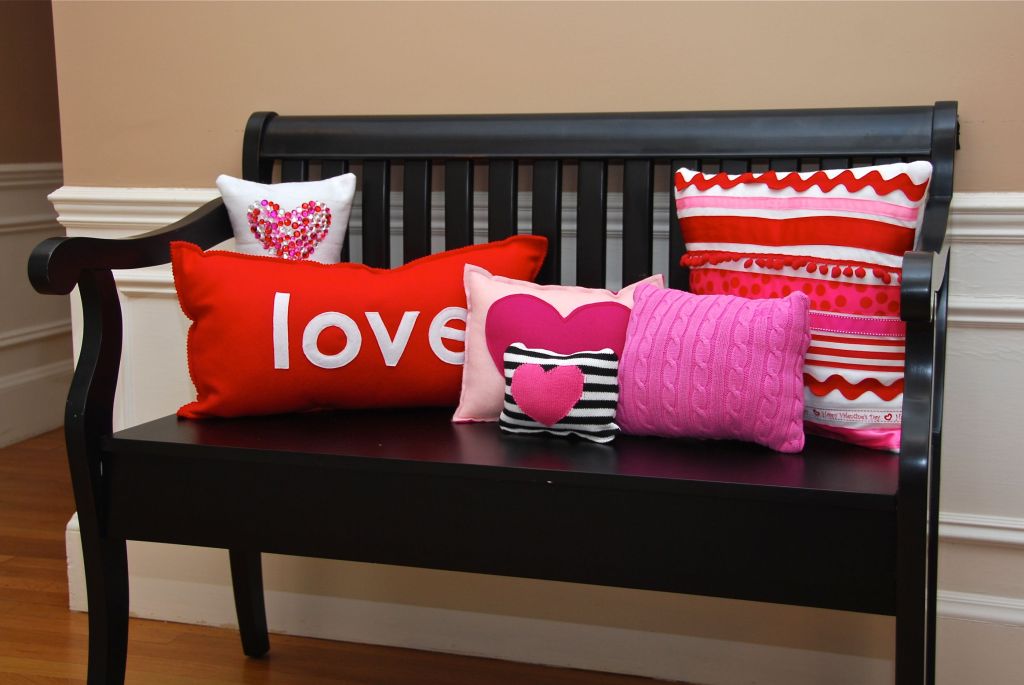
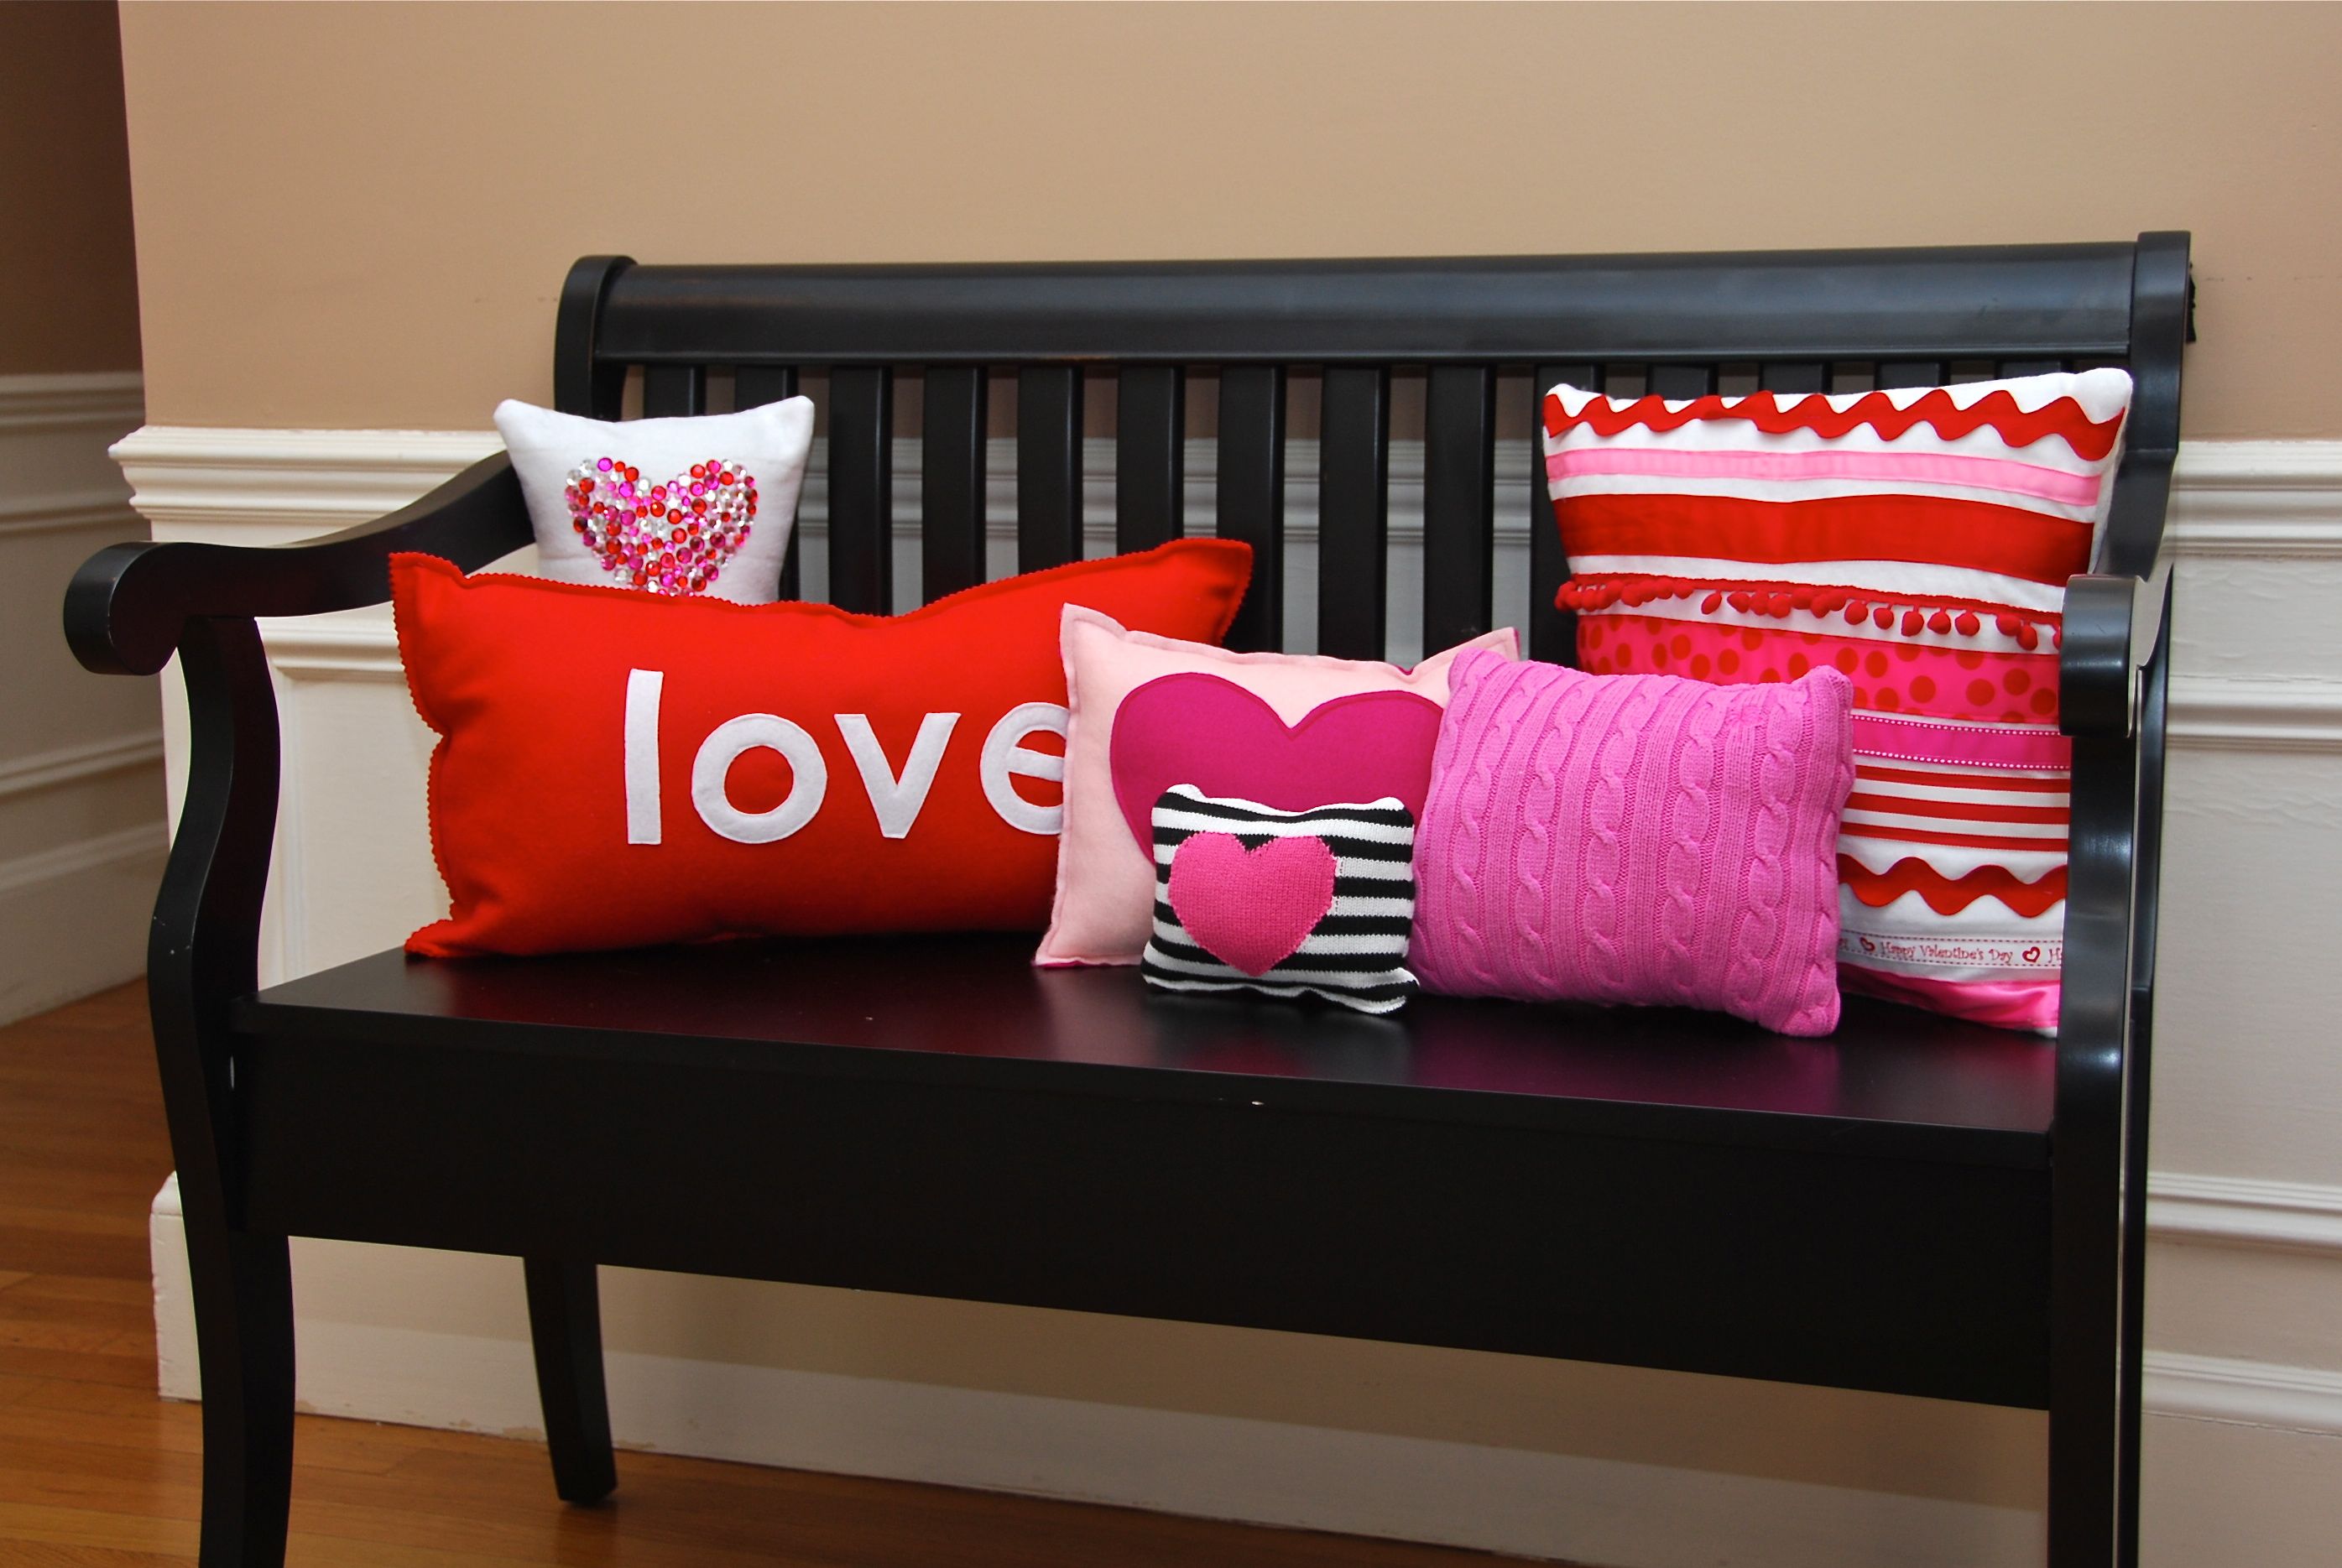
These little cuties were made by Felt So Cute, {I’m loving the rhinestone heart one!} I have a bench on my front porch that would benefit greatly from some friends like these.
                                 
She shares how she whipped these cuties up HERE.
I was strongly leaning toward ruffles for the pillows in my family/living room, this made my decision for me… Caroline from Artfully@ Atelier Caroline crafted this amazing cloud of fluffiness…
  

And how about these beauties from Brassy Apple? I want to run and jump right in…
 She shares the tutorial HERE.
...and last, I’m dying to  try something like this…
Jen from Tatertots and Jello put these together before Christmas. I loved it then, love it now. I think it would be fun to use my last name across the top and then a few words that describe our family on the bottom. She posts the how to’s HERE.
Have pillows you want to share? I’d love to see them, I have a lot of pillow friendly places that need to be filled in my house and anyideas are welcomed. You can link them up tomorrow to my T.G.I.F.-Thank GOODIES it’s Friday! Linky party-or anything you’ve been working on. The link opens at midnight CST.
Happy Crafting!
Related Posts Plugin for WordPress, Blogger...