Hi there! And welcome to Craft Goodies. I'm thrilled that you've stopped by and hope you find something here that makes your visit a great one...
Showing posts with label mini albums. Show all posts

Wednesday, July 27, 2011

Meet My Friend...Moriah from Fuzzy Slippers Designs!!!


Hi, I'm Moriah from Fuzzy Slippers Designs here to chat you up today.  My blog is full of paper crafting, gardening, tablescaping, and travel goodness.  By day, I am a Reading Specialist helping first graders navigate the tricky world of begining reading.  By night I slip on a pair of fuzzy slippers and shuffle off to my craft studio to create little pieces of mail art. :)  I come from a long line of artistic/crafty/creative people and have been blessed to be married to my best friend (who is pretty creative himself!).  So far I have managed to be able to live in NY (the upstate, not the city), SD (love the folks on the Sisseton-Wahpeton Rez!), and SC (go Clemson Tigers!), and find myself landed in beautiful MA (in the heart of New England apple orchard country) But enough about me, let's get to the tut!!!


With the beautiful summer weather we've had on the New England Coast, lots of us have been hitting the beach to cool off.   :)  The summer flies by so fast that this little gem is fast, easy, and a great memento of warm weather days.  Don't let the supply list scare you off though.  It looks like a lot when listed, but the photo below pretty much includes everything I used (and a few items I did not).


Supplies needed:

2- 4"x4" coasters 

(I bought mine, but I've also gotten them from TGIF's/Chili's/The 99)

4- pre-cut 4"x4"squares of pattern paper for the coaster covers inside and out

3- pre-cut 4"x4"squares of kraft card stock

2- pre-cut 4"x4"squares of aqua card stock

5- pre-cut 3 1/4"x3 1/4"squares of assorted pattern papers

1 yard ribbon for tie closure cut in half

1 large parcel tag

additional scraps of pattern paper and card stock for page & cover embellishment

additional coordinating ribbons/twine in various lengths for page embellishment

assorted small beach/summer themed stamps

assorted stickers & rub-ons

coordinating dye ink pads/ chalk ink pads

1" circle punch

scallop border punch or die

acid free adhesives

scissors & paper cutter

corner rounder

Zutter or other binding machine


I'm so much like my 6 year-old students!  I was so excited to start this book that I made my first step (after deciding on which luscious papers to use), adhering the 3 1/4" papers to the 4"X4" card stock squares.  After assembling these I realized I had forgotten to assemble the covers!!!  Be patient, I'll get back to the covers. LOL!


This page lacked a little personality, so before I even adhered the water paper, a little lobster was stamped around the edges of the kraft paper.  Since the covers have wave pattern paper that is slightly different, the additional stamping gives this page a little more stand alone umph. ;)


My next step was to assemble the covers and the back of the pages I had just assembled.  My coasters have rounded corners, so I used my corner rounder to have the pages and cover papers echo the shape.  *Round the corners before adhering the cover papers.  If you don't have a corner rounder, then adhere on side of the cover and trim with your scissors before adhering the other side and repeating.  That way your corners will have a crisper rounded edge.


So back to the covers!  I like my scrapbooks to have a tie closure, so I attach a ribbon with double-stick tape to the inside cover and then adhere the pattern paper over the ribbon.  Then it's all about having fun with inking the edges, adding tabs/ribbon/rub-ons/stamps.


There isn't always much room for journaling in such small scrapbooks, so for this page I added labeled pocket with tag.  Easy to assemble, just edge the sides and bottom with liquid glue or extremely narrow double-stick tape.  The tag could be swapped out for a map or ticket stubs from a water park, but having the pocket labeled with the information rub-on is a great way to remind yourself to include those when/where details for future reminiscing. :)


This page has that fun stamped mini lobster page on the right.  It looks a little naked as layouts go right now, but keep in mind that on a 4"x4" page a picture can take up a great deal of space.  I had to remind myself not to get "too nuts" with embellishments because they may end up covered by pictures later.


In addition to my many addictions (Netflix, Kindle books, fuzzy slippers and tablescapes) I adore dies 'n die cutting tools.  The scalloped edge on the left side is one of my newest go-to dies (just wait to see how cute it looks on a page further down).


Scraps leftover from page one circle punched and some foam tape give these pages a little drama with only a little effort. :)  A rub-on at the bottom anchors the page while giving 


Here's that fun scalloped border again.  Isn't it cute as a faux awning for this final page?!?  A little foam tape to adhere this one and the picture can slide under the awning a wee bit to make an awesome ending to this pocket sized memento.


Hope you enjoyed this little tut.  I had fun visiting with all of you today!  Feel free to email me with any questions or hop over to Fuzzy Slippers Designs.  I'd love to hear from you and see your creations. :)

Hugs,
Moriah


I was SO excited when Moriah offered to share this tutorial-what a great way to capture your summer memories! Mini albums are my favorite because they are quick to put together and don't take a ton  of supplies or storage space. And my girls LOVE that they can each have their own.

Thanks so much Moriah for sharing this, can't wait to get home to make a few!
Happy Crafting.

Wednesday, May 4, 2011

Teacher Appreciation and Year End Gift Ideas (part 2)

All righty, here we go with:
Album # 2...the School House!
 

Here's what you'll need:

1/4 inch MDF or chipboard/thin card board
paint or paper to cover the school house, eaves, and bell
paper for the doors and name plate
Black ink pad
ribbon
2 buttons
fine tip sharpie
Glue dots
3 pieces of 12x12 inch scrapbook paper
*if you paper cover the school house you'll need mod Podge*

Finish the Covers...

Following the patterns, cut out all the pieces needed.
SCHOOL HOUSE FRONT COVER PATTERN
SCHOOL HOUSE BACK COVER PATTERN
SCHOOL HOUSE DETAILS PATTERN
* CLICK THE LINK. CLICK ON "FILE" ON THE FAR LEFT. CLICK PRINT.*
 
Paint the front and back covers red, all sides.
Paint the eaves, once dry, glue into place.
(Refer to picture)
Cut the bell, doors, and nameplate pieces. Distress edges with black ink, add additional details with the sharpie and glue into place.
Add a bow to the top of the bell and the buttons to the door.
Set the covers aside.
 
Assemble Pages...

Just a little after thought...you could use the page folding technique for either album (the fold out here, or the accordion fold from the Crayon Album) the covers are about the same size, either would fit! So go with the one you like best.


Fold each of the 12x12 sheets into fourths.
 

Then make 1 diagonal fold into each paper square.
 

Unfold all three papers and lay them side by side so that the diagonal fold is running straight up and down.
Over lap the bottom right square of page one with the bottom left square of page two.
It doesn't matter which one is on top, pick the paper you want showing and then glue them together.
It should look like this:

Repeat those steps with the second and third pieces of paper, over-lapping and then gluing.
You will end up with one continuous piece of paper that looks like this:

Fold the Pages:

Start with the page furthest to your left.
Using the diagonal fold as your guide, push the fold (B) toward square A.
Repeat with the second fold (C) pushing it in toward square A.
All of page one should sit on the glued square of pages 1 & 2. See 3rd picture above.


Turn the entire piece over so that the square you just folded is face down and furthest to your left.
Repeat the steps above using the diagonal fold as your guide to push in the folds.
You should end with the folded pieces filling the glued square of pages 2 & 3.


Turn the piece over again and repeat the folds.


You should end with a 6x6 inch square.
Right side up = backside of page 1 face up, back of page 3 face down .
Open end of folded pages closest to you.
(See above picture) 
To unfold it, grab it by the bottom right corner and pull back.

To glue the pages into the covers, refold the pages.
Center the folded paper square onto the back cover, then glue into place.

Add glue to the top piece of folded paper and then place school house cover on top-
line up the covers to be sure everything is centered!


Decorate the Pages:
 
You will have four 6x6 squares to fill, you can decorate the triangle folds too.
My first square is a chubby little hand print and signature.

The second was a fun year-end picture.

Square #3 was their diploma.
And square #4 a class picture.


Wahoo! Two albums down, a few baskets to go. These really are pretty easy to put together-let me know if you get lost anywhere in the directions...
 
Happy Crafting! 

Teacher Appreciation and Year End Gift Ideas...(part 1)

Once upon a time, I was a full time preschool teacher.


 One of my favorite times of the year was graduation. Okay, it was also one of the saddest, but I loved being able to look back and see the growth that my little buddies had made over the year.


I'm really big on making keepsakes with my little people, they are only little once! And graduation was no exception. I wanted something special that they could keep forever to remember the year that we had spent growing and learning and came up with these...
 
School House Diploma/Fold Out Album


...and Crayon Diploma/Accordion Album


I'm going to walk you through the crayons first...keep in mind that for a teacher gift, you might only want a few pages with a class picture, maybe some fun pics from throughout the year and maybe a special note...

My covers are cut from 1/4 inch MDF but you could easily substitute chipboard or thin cardboard.
Trace out the pattern and cut your pieces, you'll need two.
If you use wood, give the edges a quick sanding.
 COVER PATTERN
DETAIL PIECES PATTERN
*click the link. click on the "file" tab on the far left. select print.*


Finish the covers...

Trace the covers onto colored card stock.
Cut out the images and adhere them to the cover bases, ink the edges.
Trace the detail pieces onto desired color card stock, cut out, ink edges, and adhere onto crayon cover.
Add name to center oval-I used stickers!
Repeat the same process for the back cover. You can add the detail pieces if you'd like.


Assemble the pages next...
Determine the number of pages you want in your book, mine has 8.
Cut your page card stock to 6 long x 7 inch wide.
 Make a one inch fold on each page so that your page measures 6 inches square + 1 inch fold...


Lay the pages out so that the fold is on your right hand side. Glue the left edge of the second page onto the fold of the first page, being sure to line up all the edges and that the fold is UNDER the second page.

Front side up
Looking at the back side
 Repeat this same step until all pages are glued together.
 Cut off the "fold" on the last page.

Fold the remaining pages in a fan-like pattern, forward, back, forward, back, etc. until you get to your last page.

Center the first page onto the back of the front cover and glue into place.


Glue the last page to the inside of the back cover-be sure to center it.


Decorate your pages!

My first page is an info page that I had them fill out in the fall.
The second was their hand print made in the spring:

Hello! My name is ____________
I write it like this:

I am ____ yrs old. My favorite color is _______.
I like to play __________.
This is a picture of me:
*they drew a self-portrait here
(date info was taken)

The third page is a spring picture, the 4th was the same info page re-done in the spring:


The 5th page is a class picture, and the 6th was their diploma:


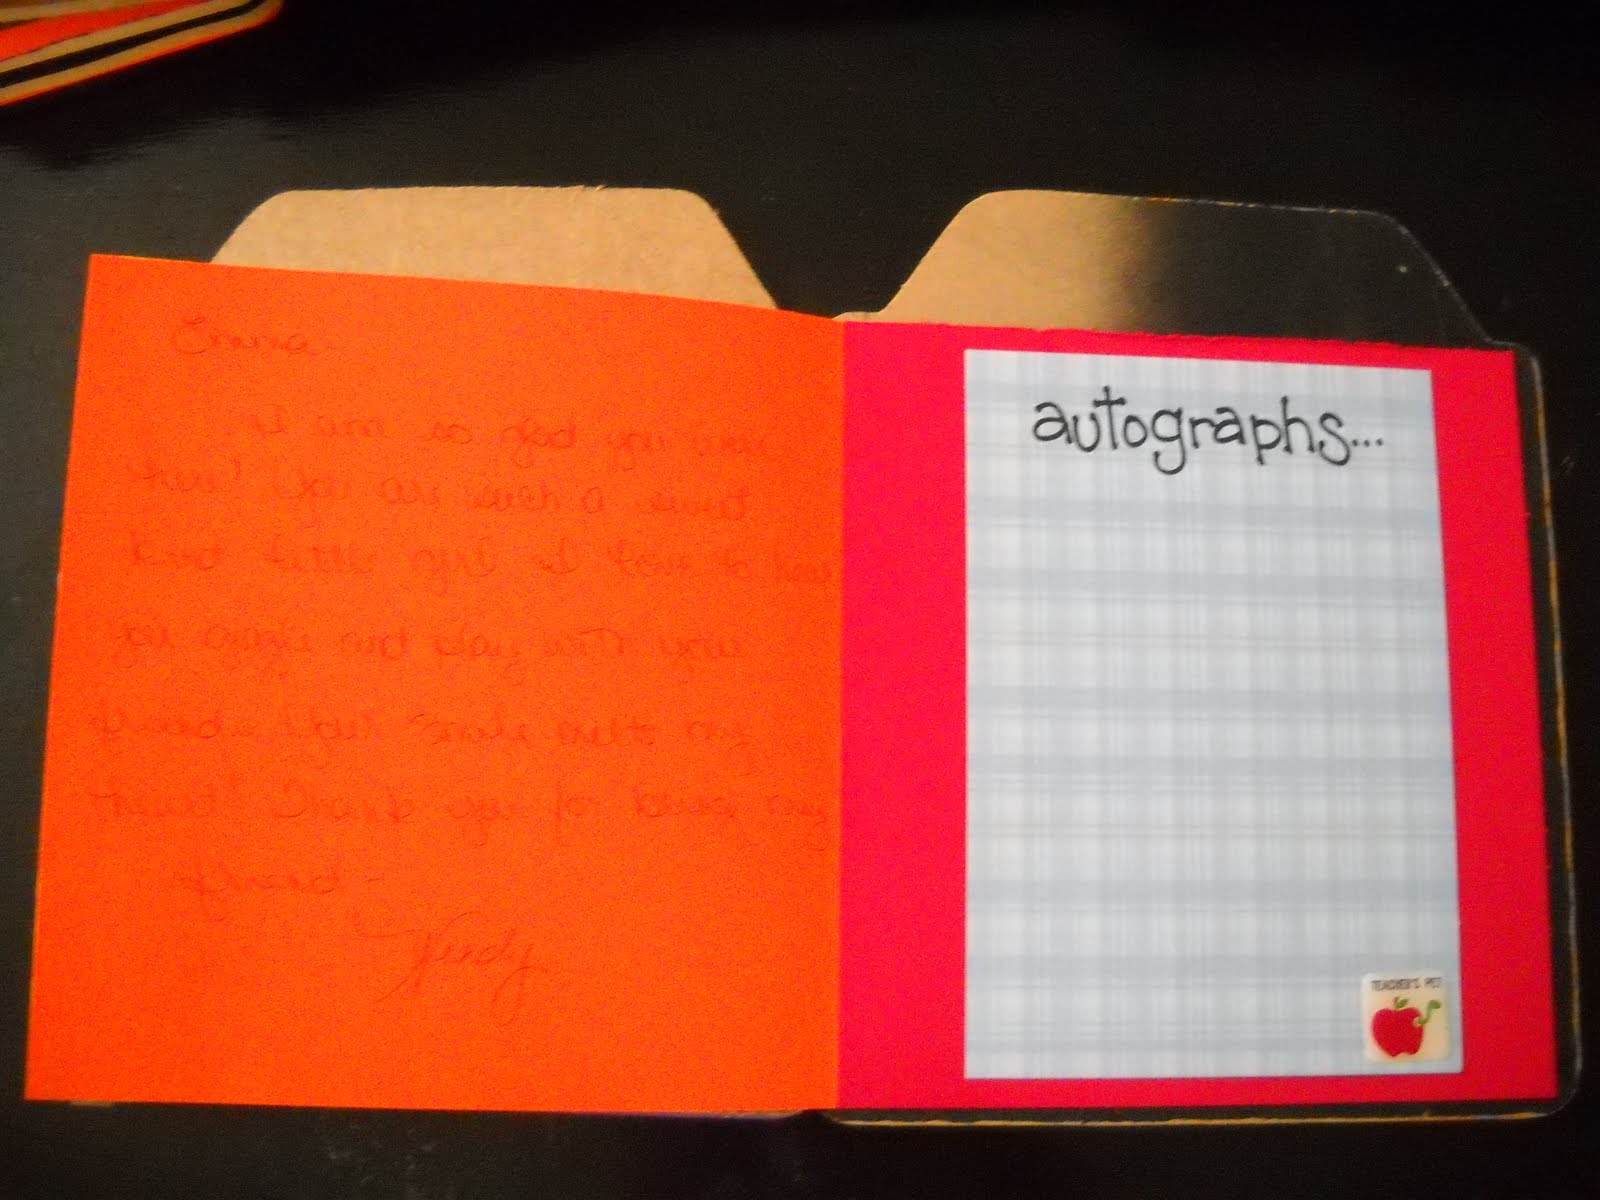
And the 7th page was a letter written from me to them, and last a place for auto-graphs!


There you go! You did it!

One very cute, very sweet little crayon album.
Wouldn't you just LOVE getting one of these?
Or better yet, seeing the look on your teachers face when you give them one!

PLEASE!!! Let me know if you have any questions. Thanks!

Happy Crafting...


Tuesday, January 18, 2011

Tuesday Treats featuring...YOU!

Another great weekend of fantastic links, and HOORAY! we grew!!! You all seriously ROCK my little world and make it a happier place to be-
 
Thanks again to all of you that shared your goodies, here's a few I've added to my list of things to try...
 
First let me say this is ADORABLE! Second let me tell you it came from toilet paper rolls!
I have seen some amazing things popping up out there made from those little cardboard rolls-this has to be one of my favorites. I to this point, only recycle them. Guess I need to rethink my "green" ways.
You can find this and pictures of the inside pages at
 Cherished Treasures.
 
 
This next one is screaming at me...MAKE ME NOW!!!
We don't have a lot of rain or snow here in our part of Texas, but for some reason we have a ton of mud {and saw dust-I do all my cutting on the back patio!}that finds it's way in through the back door.
This would be so much prettier than the ugly rug that's there now.
Find the tutorial to make this shoe/boot tray at
Clean and Scentsible
 
And this, is sheer brilliance in my book!
Homemade Bathtub Paints.
Maybe it's because I have a painter in my home that paints everything but what should be painted, wait-she's 3 and shouldn't be anywhere near the darn paint! But, this little gem gives me hope, as it's washable it means less ruined everything! Plus, it would make a great gift. 
A super tutorial on how to make these can be found at
Our Seven Dwarfs
 
and last, every woman needs a great bag {or two or three...}
and I want this one!
You need to go read Amy's post, would you have ever guessed this was not how it was supposed to look?
She shares the link to the pattern and a great story at
Ameroonie Designs
 
Amazing! Thanks again to all of you for linking, I love getting to know and visit more of your blogs.
Craft Goodies

 
Please grab a featured button and let your world know how awesome I think you are!
Happy Crafting!
Related Posts Plugin for WordPress, Blogger...