Hi there! And welcome to Craft Goodies. I'm thrilled that you've stopped by and hope you find something here that makes your visit a great one...
Showing posts with label Monday Munchies. Show all posts

Monday, February 20, 2012

President's Day Treats!!!

A short story...
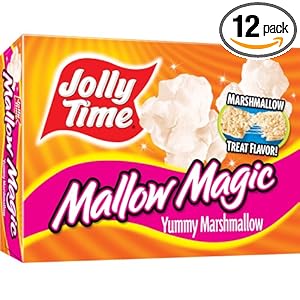
Once upon a time ( a few years ago) I was shopping at my local Albertson's. Went to grab a box of microwave popcorn or two and stumbled upon Jolly Time Mallow Magic.
In my own opinion, it's heaven in a box.
Microwave popcorn all covered in this sweet, gooey, marshmallow wonder. As fast as I had discovered it, it was gone. I couldn't find it anymore!
My household was devistated until a trip to Utah this past summer and alas, there upon the tiny little store's shelf...there it was. I bought every box they had.
My dad thougt I was crazy--until he tried it, then he begged me to leave a few boxes.
We drug it out as long as we could...it wasn't long and the saddness returned.

And then, just a few weeks ago, I was blessed to find this little pin...

WE ARE OBSESSED WITH THIS! Marshmallow popcorn! my favorite!   3 bags popcorn (pop and take out extra kernels)  2 sticks of butter 16 oz bag of marshmallows 1 cup brown sugar  Microwave butter, marshmallows, and brown sugar for 2 1/2 min. Take out and stir. Microwave again for 1 min. Repeat until thin sauce. When done pour over popcorn and mix. YUM!


"WE ARE OBSESSED WITH THIS! Marshmallow popcorn! my favorite! 3 bags popcorn (pop and take out extra kernels) 2 sticks of butter 16 oz bag of marshmallows 1 cup brown sugar Microwave butter, marshmallows, and brown sugar for 2 1/2 min. Take out and stir. Microwave again for 1 min. Repeat until thin sauce. When done pour over popcorn and mix. YUM!"

So close to the perfection I had found! Thank you Pinterest!
We will be enjoying this today as we have no school and no where else to be...oh happy day!

Hope yours is a good one...


Monday, October 24, 2011

Monday Munchies...Pecan-Caramel Spiders!!!


I ran across this recipe over the weekend while trying to find a fun treat for my girls. While they wouldn't eat this because of the pecans, I certainly would...I think.
How about you?
 Can you handle eating a spider, even the chocolaty variety? It might be worth a try...

Pecan-Caramel Spiders

From Food Network Kitchens

Ingredients

Directions

Line 2 baking sheets with waxed paper and lightly spray with nonstick spray. Mound 30 small clusters of pecans, about 3 or 4 pecans each, spaced a couple inches apart on the pan.
Make caramel: Warm the cream over low heat and keep warm while you cook the sugar.
Put the sugar and corn syrup and in a deep, heavy-bottomed large saucepan. Cook over medium heat, stirring occasionally until the sugar dissolves. Stop stirring, raise heat to medium-high, and simmer until the sugar reaches the hard crack stage, or 305 degrees F on a candy thermometer, about 7 minutes.
Whisk the butter and salt into the sugar mixture. Gradually pour in the cream and vanilla taking care since the mixture will bubble up. Reduce the heat to medium and continue to cook, stirring occasionally, until the sugar reaches soft ball stage, 240 degrees F on the thermometer, about 5 minutes more. Immediately remove from the heat and cool for a minute.
Ladle a couple tablespoons of warm caramel over some of the nut clusters, to make the spider bodies. Then press 6 pieces of licorice into the warm caramel to make the legs. Repeat with the remaining caramel and licorice. (It's helpful to have an extra hand here, since the caramel can set quickly. If caramel hardens, warm over very low heat. ) Let spiders cool 15 minutes.
Meanwhile, put the chocolates in a medium heatproof bowl. Bring a saucepan filled with 1-inch or so of water to a very slow simmer; set the bowl over, but not touching, the water. Stir the chocolate occasionally until melted and smooth. (Alternatively, put the chocolate in a medium microwave-safe bowl. Melt at 50 percent power in the microwave until soft, about 1 minute. Stir, and continue heat until completely melted, 2 to 3 minutes more.)
Spoon about 1 tablespoon of melted chocolate on top of each spider. Sprinkle with jimmies or chocolate curls, if desired. Let cool until firm.


Let me know if you were braver than me!!!
Happy Crafting.

Monday, October 17, 2011

Halloween Hoots and a Goodie to Go With!

Hello there friends!
Happy Monday to you all, hope your weekend was full of rest and fun. Just a little quickie to share with you today. I found these little cuties a while back and immediately fell in love.

Pinned Image
from wipkits.blogspot.com
Can you think of a little munchkin that wouldn't love getting one of these? So much fun! And how perfect for a class Halloween treat.
My kiddos are super picky when it comes to any sort of "trail mix" so I've been searching for the perfect one and think I might have found it...finally!

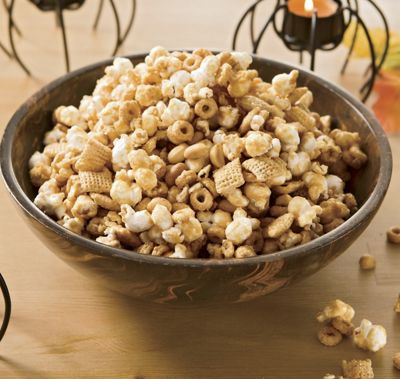
Popcorn Scramble
recipe from CountryDoor.com

6 c. freshly popped popcorn
2 c. Rice Chex ®
2 c. Cheerios ®
1 c. salted peanuts
1/2 c. butter or oleo
1 c. brown sugar
1/4 c. light corn syrup
1/4 tsp. baking soda
1 tsp. vanilla

Mix popcorn, Rice Chex, Cheerios and peanuts in a large bowl. Preheat oven to 250 ° F. Melt butter in a large saucepan; stir in brown sugar and corn syrup. Heat slowly, stirring constantly, to boiling. Cook without stirring another 5 minutes. Remove from heat; stir in soda and vanilla. Drizzle over popcorn mixture and toss until evenly coated. Spoon scramble into a shallow pan and bake, stirring several times, for 1 hour. Cool. Store in a tightly covered container.


Still going to have to omit the peanuts but the rest is a keeper! Let me know if you try it too.
Happy Crafting.

Monday, July 18, 2011

Meet my Friend...Brooke Anna from Mommy Does!!!

Hey Y'all!
My name is Brooke Anna, 
and I blog at the little place called Mommy Does...

(Don't you love my Southern Draawwwl?)
Button
I'm so glad to be over here today, and I'm hoping you will enjoy my company for a bit!
I'm more of a Crafty person, but like to dabble in recipes.
With having two little ones, and a full-time college career
 I can't very well devote a gazillion hours to my hand mixer, pots or pans, can I?

So, today I want to share a QUICK, family friendly, happy tummy maker.
 I have absolutely drooled over this "recipe" since I was a little girl.
What is it you may ask?

{Aunt Nana's Southern Banana Puddin'}
 of course!
Since I was knee-high to a grasshopper
 my Daddy's sister,
 my Aunt
(say it with me... ANT)
 Anna
 {^see the name sake?^}
has made the most delicious banana pudding.
The recipe isn't really a family recipe, but I hope it sticks with our family for years to come.
B's family absolutely loves my Aunt Nana's Southern Banana Puddin'
I know, I know... I'm putting my family heirlooms business all out there right?
Well, when you Guest Post @ Craft Goodies,
you have to BRING IT!

{Items Needed}
-A little more than a half-gallon of Whole Milk or 2%
-1 pint Heavy Whipping Cream
-1 Box Vanilla Wafers
(or two for the perfect cookie-puddin' ratio)
-2 boxes each-
  Regular sized Instant French Vanilla & Banana Creme pudding
-1 Bunch Bananas
(or to taste)
-Large Mixing Bowl
-Serving Pan/Storing Bowl
-Handheld Mixer, or Standing Mixer
-Whisk (optional, haha!)

Since I like to be done with it, I use instant puddings.
Using instant just makes the process easier!
In case you couldn't tell from the picture above...
I buy store brands... :D

Step 1-
Pour all 4 boxes of your pudding mix into a bowl.
Normally the milk/pudding mix ratio is 2 cups per regular sized box... scratch that!
This is "Southern" remember?

Step 2-
Add the entire pint of Heavy Whipping Cream.
Yes, for real! Add it all!
See? that pint gives you a little more than two cups of cream.
Step 3-
Add 5 cups of whole milk.
Step 4-
Mix the pudding mixture until all the lumps and bumps are gone.
Continue mixing until its "wrapping" around the mixer.
Now stop.
I like my pudding to be fluffy and thick,
 but if it is too think I just add about a quarter cup more of milk.
Step 5-
While you let that rest, cut all your bananas you want to use into "wheels."
For the layering...
Step 6-
Place a thin layer of pudding on the bottom of the pan or bowl you are using to serve or store.
Step 7-
Get your Vanilla Wafers and layer on top of the pudding.
Step 8-
For the third layer, spread sliced bananas on top of the cookies.
Repeat Steps 6-8 until all the bananas, cookies, and pudding are gone. 
(I use two boxes of Vanilla Wafers, so I always make sure I have cookies left...)
Step 9-
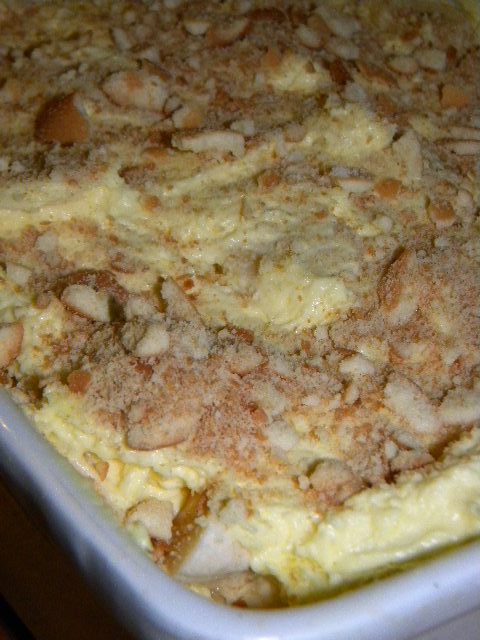
Just crumble the leftover cookies on top!
And there you have it!
"Aunt Nana's Southern Banana Pudding!"
Step 10-
ENJOY!
It's thick, it's indulgent, it's NOT Guilt Free!
This is great for cook-outs (just keep chilled,) family dinners,
Church or Community Suppers.
Whatever occasion!
I also like making it in food storage containers and giving them to family and friends.


I hope you enjoyed my hap-hazard tutorial, and I'm sorry there aren't more photos!
But, I hope you'll still check me out at
Thanks so much for allowing me to visit, Wendy!



Thank you! I know what I'll be making at my dad's this week-Y.U.M.!!!
And super easy to boot, thanks for sharing, (and thank you for always being so great to me)!
Happy Crafting.

Monday, June 27, 2011

Red, White & Blue Yummies!!!

We decided to host a 4th of July BBQ this year.
 WAHOO!
I love a great party, hopefully that's what it will be. My hubster is a master at the grill so that part is easy, it's the pretty, fluffy, in between stuff that I'm working on.
 I've been surfing around trying to find some fun goodies to try, just thought I'd share a few of what I've found that just may end up on my picnic table...
Watermelon is a give right? My kiddos would go crazy for these:
Banana Split with a Twist

Aren't these gorgeous! And 1/2 of the ingredients are healthy...
Picture of Cream Cheese and Pecan Stuffed Berries Recipe
Cream Cheese and Pecan Stuffed Berries
...that is my dream come true right there!

This one has my husband's vote...
Picture of Red, White, and Blue Trifle Recipe
Red, White, and Blue Trifle

Something a little lighter than ribs and hot dogs maybe...
Picture of Chicken Salad Sliders Recipe
Chicken Salad Sliders

...and you have to have potato salad, yes?
potato, salad, recipes, 4th, july, party, receipts

how about a Red, White, and Blue one?
..and last, some fun Patriotic Pops to beat the heat maybe?
Patriotic Pops

So what's on your Independence Day menu? I'd love to know!
Happy Crafting...

Monday, June 20, 2011

Peach Melba Ice Cream Cake!!!

Summer officially starts this week!
 (Although I am positive it found Texas early!!!)
 
This is one of my favorite summer desserts.
Super easy, quick to put together and it requires no baking to heat up the house.
Perfect, hope you enjoy it as much as we do...


Peach Melba Ice Cream Cake
Serves 8     20 minute prep + 5 hrs of chill time
1 ring shaped angel food cake (about 13 0z)                                1 pint frozen raspberry sherbet, slightly softened
¼ C raspberry pie filling
FRUIT TOPPING:
2 med. sized fresh peaches, cut into small chunks      1 C fresh raspberries          ½ C raspberry pie filling
1.       Place the cake, top side down, on a plate. Using a long serrated knife, slice a ½ inch layer from the top of the cake, lift the slice off in one piece and reserve.
2.       Using a small serrated knife, cut a trench in the cake ½ inch in from the inner and outer edges to within a ½ inch from the bottom. Carefully remove the center without breaking through the bottom or sides.
3.        Spoon 1 cup of the sherbet into the trench. Spread evenly with the back of a spoon, around the trench. Drizzle with the pie filling and top with the remaining sherbet. Replace the reserved cake top onto the cake and gently press down.
4.       Freeze for 1 hour, then wrap loosely and freeze for at least 4 hours, or overnight.
5.       Make the topping: In a med. bowl, gently mix the peaches, raspberries, and pie filling.
To serve, remove the cake from the freezer and invert it onto a serving plate. Spoon the topping into the center and serve right away.


*I added about a cup of blueberries to the fruit mix cause everything is better with a blueberry on it!
 

Monday, May 30, 2011

Pudding Pops x 2!!!

I was watching the weather reports for this upcoming week and it's supposed to be
HOT!!!
I found these two frozen pudding pop ideas over the weekend and think they will be on the menu more than once this week.
They are cute, look super tasty, and the kidlets can make them (almost) on their own.
That makes them PERFECT to me!
enjoy...
 
 
Rainbow Pops from
Random Thoughts of a SuperMom!
 
and
Root beer Float Pops
from Smile Monsters
 
Don't they look just heavenly?
 I'm thinking there has to be a way to turn that root beer into orange cream-OH! it could be a fun filled pudding pop week here at the Gardiner house.
 
And cause I know you're making them, I'm giving the chance to link them!
Keep those summer meal ideas coming cause well, it's way to hot to cook!!!
 
Happy Crafting All!

Monday, May 16, 2011

Birthday "Fishes" and {Easy} Cream Cheese Frosting!

Last week was the week of a million cupcakes!
 I think by week's end I was up to 10 dozen, that 's a lot of cupcakes...
these were my favorites of the collection.
My "summer birthday" gal was celebrating her special day and wanted fish cupcakes.


Thanks to circus peanuts, peanut butter and mini m&m's, and apple jacks we ended up with two dozen little swimmers!
(Decorating Ideas via "What's New, Cupcake?")
I added a little flag to each cupcake that read "Happy Birthday Fishes Ashlyn!"
They went over very well, went together pretty quick, and caused me to find a great
"faux" cream cheese frosting.
 
I was in a bit of a hurry and realized I was out of powdered sugar to finish the frosting-no time to hit the store. I did have a can of this...


I'd heard that if you add a tsp of vanilla to a can of frosting it helps it to taste not so out-of-a-can.
So I added 2 and a brick of cream cheese, whipped it all together and WOW!
It was good! Super creamy with just that little bite that cream cheese frosting has.
I may never make the real stuff again!

Hope your week is off to a great start, happy munching!


Thanks to those of you that have shared your recipes! We've had so much fun trying them, I've even shared a few with my friends-they think you're all geniuses!!!!


Monday, May 2, 2011

Monday Munchies...South of the Border!

Happy Monday and Happy May!
 Can you believe it's already that far into the year?
My kiddos only have a few weeks of school left-unbelievable!
We had a great weekend, end of the season softball parties, last of the spring soccer games, mulched and planted the gardens, and got a project or two finished.
 
We also had a great dinner Saturday night-homemade Mexican! Y.U.M.
I am such a wimp when it comes to any type of spice, while the rest of my family can't get it hot enough, so keeping it made at home lets us all be as "HOT" as we can take it.

I found a great salsa recipe that added to everything.
My own little bowl of extra mild, and a big bowl of holy-cow-that-will-burn-your-tonsils-out hot for the rest of them!
Just play with the peppers to adjust the heat...
Joe's Salsa 

Recipe via Favorite Family Recipes

 
So what did we have with our salsa?
Black Beans and Cilantro Lime Rice
 
and Chicken Chimmies!
Super fast and easy...
4 chicken breasts seasoned with salt, pepper, and garlic powder pan fried then shredded. 
A few TBS of chicken is then placed onto a tortilla with a sprinkle of green onions and monterey jack cheese. Roll like a burrito and then cook in a frying pan, turning until all the sides are a crunchy, light brown.
Add the salsa, sour cream, guacamole and enjoy! 
 
So good. So quick and easy. So muy bueno!!!
 
Happy Eating...
 
Keep those salad recipes coming! I'm loving them!!!

Monday, April 25, 2011

Monday Munchies...What to do with all those EGGS!


Oh my look at the time!
I had to get my holiday company out the door and on the road to home before I could tackle a post, thanks for your patience!
 
Did you have a great weekend and Easter? Did the bunny find you?
He did us, and left a TON of hard boiled eggs in his wake, so now what do we do with them...


Deviled Eggs anyone? Always a hit at my house (and a quick and easy way to get rid of a bunch of the little buggers fast!).

ingredients


  • 6 Hard-Cooked Eggs
  • 1/4 cup mayonnaise or salad dressing
  • 1 teaspoon prepared mustard
  • 1 teaspoon vinegar
  • Paprika or parsley sprigs (optional)

directions

  1. Halve hard-cooked eggs lengthwise and remove yolks. Set whites aside. Place yolks in a small bowl; mash with a fork. Add mayonnaise, mustard, and vinegar; mix well. If desired, season with salt and black pepper. Stuff egg white halves with yolk mixture. Cover and chill until serving time (up to 24 hours). If desired, garnish with paprika or parsley.
  2. Makes 12 servings
Now get crazy and mix it up with a variation or two...that way when you're still eating eggs a week from now, you won't hate them quite so much!
  1. Italian-Style Deviled Eggs: Prepare as above, except omit mayonnaise or salad dressing, mustard, and vinegar. Stir 1/4 cup creamy Italian salad dressing and 2 tablespoons grated Parmesan cheese into mashed yolks; mix well.
  2. Greek-Style Deviled Eggs: Prepare as above, except fold 2 tablespoons crumbled feta cheese, 1 tablespoon finely chopped pitted kalamata olives or other pitted ripe olives, and 2 teaspoons snipped fresh oregano into yolk mixture. If desired, season with black pepper.
  3. Curry and Crab Deviled Eggs: Prepare as above, except omit mustard and vinegar. Stir the mayonnaise, 2 teaspoons Dijon-style mustard, 1 teaspoon snipped fresh chives, and 1/2 teaspoon curry powder into mashed yolks; mix well. Fold in 1/4 cup drained, flaked canned crabmeat.
  4. Chipotle Deviled Eggs: Prepare as above, except omit mayonnaise, mustard and vinegar. Stir 1/4 cup dairy sour cream, 1 tablespoon finely chopped green onion, and 1 teaspoon finely chopped canned chipotle peppers in adobo sauce into yolk mixture.

If that's not getting you "egg"cited, give this one a try...

Egg Salad Sandwiches

ingredients


  • 4 hard-cooked eggs, chopped
  • 2 tablespoons sweet or dill pickle relish
  • 2 tablespoons finely chopped red sweet pepper
  • 1/4 cup mayonnaise or salad dressing
  • 1-1/2 teaspoons yellow mustard
  • 4 croissants, split
  • 4 leaves red-tipped leaf lettuce
  • 4 to 8 slices Colby and Monterey Jack cheese or cheddar cheese (4 to 8 ounce)

directions

  1. For egg salad, in a medium bowl stir together eggs, pickle relish, sweet pepper, mayonnaise, and mustard. If desired, cover and chill for up to 6 hours.
  2. To assemble sandwiches, layer the bottom halves of the croissants with lettuce leaves. Spread egg salad over lettuce; top with 1 or 2 cheese slices. Add top halves of croissants. If necessary, use wooden toothpicks to secure sandwiches. Makes 4 sandwiches.
  3. Curried Egg Salad: Add 1/2 to 1 teaspoon curry powder to the egg salad. Cover and chill for 2 to 6 hours.
  4. Honey-Dill Egg Salad: Substitute honey mustard for yellow mustard and add 1 teaspoon dried dillweed to the egg salad.
  5. Egg Salad Wraps: Prepare egg salad as directed. Substitute four 8-inch flour tortillas for croissants. Lay lettuce leaves on tortillas; top with egg salad and roll up.

recipe source BGH.com


Don't forget to keep adding your recipes to the Simple Salads link! Maybe by summer, we'll have an entire Summer's worth!
Happy Crafting.

Monday, April 18, 2011

Easter Brunch Ideas...

This year we will be having an Easter Brunch instead of dinner as church is later in the day and the family that we will have here are flying out that evening. I've been trying to find a few tasty and new recipes to make it special. Let me know what you think...
 
Maple-Bacon Oven Pancakes
(I think I've mentioned our LOVE of pancakes before, and oven baked ones are like heaven!)
 
Maple-Bacon Oven Pancake
 
Makes: 12 servings
Prep: 15 minutesBake: 10 minutes

Ingredients

  • 1-1/2  cups  packaged biscuit mix
  • 1  cup  shredded cheddar cheese (4 ounces)
  • 2    eggs
  • 3/4  cup  milk
  • 1/4  cup  maple-flavored syrup
  • 5  slices  bacon, crisp-cooked, drained, and crumbled
  •     Maple-flavored syrup (optional)

Directions

1. Preheat oven to 425 degree F. Grease and flour a 13x9x2-inch baking pan; set aside. In a medium bowl combine biscuit mix, half of the cheddar cheese, the eggs, milk, and the 1/4 cup syrup; beat until nearly smooth. Spread in prepared baking pan.
2. Bake in preheated oven for 10 to 12 minutes or until toothpick inserted near center comes out clean. Sprinkle with remaining cheddar cheese and the bacon; bake for 3 minutes more. Cut into squares. If desired, serve with additional syrup.

Sweet Cheese Blintzes

Sweet Cheese Blintzes
Prep: 35 min.Cook: 10 min.

Ingredients

  • 1  8-ounce carton  mascarpone or cottage cheese
  • 1  tablespoon  honey
  • 1  tablespoon  milk
  • 1/2  teaspoon  finely shredded lemon peel or snipped lemon verbena
  • 1/4  teaspoon  anise seed, crushed
  • 3/4  cup  all-purpose flour
  • 1/2  teaspoon  baking powder
  • 1    egg white
  • 3/4  cup  milk
  • 1    egg yolk
  • 2  teaspoons  walnut oil or hazelnut oil
  • 1-1/2  teaspoons  granulated sugar
  • 1/2  teaspoon  vanilla
  •     Nonstick cooking spray
  • 1  cup  seedless green grapes, sliced
  •     Powdered sugar

Directions

1. For filling, in a small mixing bowl beat together mascarpone cheese, honey, the 1 tablespoon milk, shredded lemon peel or verbena, and anise seed. Cover; set aside.
2. For blintzes, stir together flour and baking powder. Set aside. In a small mixing bowl beat egg white with an electric mixer on medium to high speed until soft peaks form.
3. In a large mixing bowl combine the 3/4 cup milk, egg yolk, walnut or hazelnut oil, granulated sugar, and vanilla. Beat with electric mixer until well combined. Add flour mixture; beat just until mixture is smooth. Fold in beaten egg white (texture should be that of a milk shake).
4. Spray a nonstick griddle or skillet with nonstick cooking spray. Heat over medium heat 1 to 2 minutes. For each blintz, pour about 2 tablespoons batter onto griddle. Quickly spread batter to 4- to 5-inch circle.
5. Cook blintz pancake for 20 seconds or until light brown. Gently turn with a spatula; cook second side for 15 seconds. Invert blintz pancake onto a plate lined with paper towels. Repeat with remaining batter to make 10 to 12 blintzes. (You may cook up to 3 or 4 blintzes at a time in a large skillet.) Place a dry paper towel between each layer of blintz pancakes. Cover and keep warm.
6. To serve, spoon 1 slightly rounded tablespoon of cheese mixture across pancake just below center. Fold the bottom of pancake over filling. Fold in sides, then roll up. Arrange blintzes, seam-side down, on individual dessert plates. Top with grapes. Sprinkle with powdered sugar. Serve warm or at room temperature. Makes 10 to 12 servings.

Lemon Pancakes With Fresh Berries
  
Lemon Pancakes With Fresh Berries
 
20 min.prep time 35 min.total time
make 8 servings

Pancakes

2 1/3 cups all-purpose flour
1/3 cup powdered sugar
1 1/2 teaspoons baking soda
1 teaspoon baking powder
1 cup milk
1 cup sour cream
2 Eggs
2 tablespoons Butter, melted
2 tablespoons lemon juice
1 tablespoon freshly grated lemon zest

Topping

1/2 cup red currant jelly
2 cups fresh strawberries, halved*
1 cup fresh or frozen blueberries, thawed

Directions

Combine flour, powdered sugar, baking soda and baking powder in large bowl.

Combine all remaining pancake ingredients in small bowl; mix until smooth. Stir sour cream mixture into flour mixture until well mixed (batter will be thick).

Heat lightly greased griddle or frying pan to 350°F or until drops of water sizzle. For each pancake, spoon 1/4 cup batter onto hot griddle; spread to form 4-inch circle. Cook until bubbles form on top (1 to 2 minutes). Turn pancakes; continue cooking until browned (1 to 2 minutes). Keep warm. Repeat with remaining batter.

Meanwhile, melt jelly in 2-quart saucepan over medium-low heat (2 to 3 minutes). Remove from heat. Add strawberries and blueberries; stir gently to coat. Serve over warm pancakes.
*Substitute 2 cups frozen strawberries, thawed.


So hard to choose, just might have to have all 3!!!

Happy Crafting...


Sunday, April 10, 2011

More Super Salads...Keep them Coming!!!


  I'm still in a summer sort of mind and really want to create a great recipe link for all those amazing salads out there, so I've found a few more to add to the collection!
 
I've also reposted the link if you've got a great salad you want to share. I've tried a few of the already linked ones...haven't been disappointed yet!
Thanks ladies for sharing your goodies! 
Unbelievable Chicken Salad

Unbelievable Chicken Salad

4 skinless, boneless chicken breasts
1/2 cup cranraisins (dried cranberries)
Mayonnaise
1 small package chopped walnuts
1 tall stalk celery, chopped small
Salt and pepper to taste
Boil chicken breasts until tender; drain and cool completely. Dice chicken into small bits. Stir in cranraisins, walnuts and celery. Mix in enough mayonnaise to make salad spreadable, using 4-5 tablespoons. Salt and pepper lightly. Refrigerate about 1 hour; stir again before serving with butter crackers.
Nancys Layered Fruit Salad Recipe

 Layered Fruit Salad

20-oz. pineapple chunks or tidbits (undrained)
22-oz. mandarin oranges (drained)
One small box instant vanilla pudding
2 or 3 bananas sliced diagonally (optional)
1 pint fresh blueberries
12-oz. whipping cream (lite or plain free may also be used)
1 pint fresh strawberries (sliced)


Place pineapple with the juice in 3 quart glass bowl. Add the oranges & sprinkle dry pudding mix over fruit and stir well. Refrigerate for 20 minutes until set. Layer bananas then layer blueberries, 1/2 of the container of whipping cream and then layer strawberries. Add remaining whipping cream over the top and garnish with mandarin oranges, blueberries & strawberries. Refrigerate for 2 hours
 
Happy Crafting!


Monday, April 4, 2011

Fruit Salad with Sweet Orange Cream...Summer Salad Linky Party!

Free summer sun clip artI am craving all things summer right now! Warm days, late nights, no alarm clocks, and simple, light lunches and dinners cause it's to hot to do anything else! Here's my problem, I only know like 2 salad recipes.
I love salad, it's my favorite thing to order when we go out to eat, but I just don't know how to make any really good "meal" salads. I'm hoping you'll help...
I'm opening a "Super Summer Salad" linky party!!! 
I'm leaving it open indefinitely, hoping that we can all benefit from it's spoils!
Please, please, share your recipes for quick, easy, light, summer meals and salads...I know I don't want to spend my summer over a hot stove, do you?

I'll get us started...
This is by far my FAVORITE salad, ever! It makes a perfect lunch on it's own or goes so well with a chicken salad croissant sandwich. It's so quick and easy, 15 minutes max. And made with fresh, yummy fruit that is often on hand.
{I served this at my oldest daughter's baptism-it was a super hit! I get asked  to make it all the time.)
Ya, my mouth is watering...give it a try.
I won't think any less of you if you end up drinking the dressing (only because I've done it myself!)
Fruit Salad With Sweet Orange Cream

Fruit  Salad with Sweet Orange Cream
makes 8 1/2 C servings
Dressing


1/2 cup sour cream
1/4 cup frozen orange juice concentrate, thawed
1 tablespoon honey

Salad

1 cup strawberry halves
1 cup red apple slices
1 cup seedless green grapes
1 (11-ounce) can mandarin orange segments, well drained*
Mixed salad greens

Directions

Combine all dressing ingredients in small bowl with wire whisk; mix well.

Combine fruit in large bowl.

To serve, divide greens among 8 salad plates; top with fruit and dressing.

*Substitute 1 cup canned pineapple chunks in juice, well-drained.

VARIATION: Omit salad greens. Prepare dressing. Place fruit in large bowl. Add dressing; toss lightly.


Alrighty ladies, now it's up top you!
 Share your favorites, make my summer that much lazier, I'll love ya forever!


Related Posts Plugin for WordPress, Blogger...