Hi there! And welcome to Craft Goodies. I'm thrilled that you've stopped by and hope you find something here that makes your visit a great one...
Showing posts with label cakes and muffins. Show all posts

Thursday, August 4, 2011

Meet My Friend...Heather from Belle's Bazaar!!!

Hello, you crafty folk out there! So excited to be posting today at Craft Goodies. This is my first ever guest post, as I just started my blog, Belle's Bazaar a few weeks ago. I love sewing, making old stuff new, and painting odds and ends, but my first loves are cooking, baking and reading. I love having an outlet for my attempts at creativity. With 3 kids at home (6,3,1), I might go a little crazy without something else to work on and accomplish throughout the day!! Enough about me, let's talk muffins!

Muffins, people, that's where it's at! Is it just me, or are there not many great cooking blogs with muffins? I find a few here and there, but it is hard to find a one stop shop for muffin recipes. Every Monday, we have muffins and smoothies at my house. It's my kids favorite dinner of the week. We usually have the same strawberry banana smoothie, but I do a different muffin every week. These are the king of muffins.....Brown sugar muffins!


a
Picture courtesy of RedVanilla.com. You would think after how many times I have made these, I would have at least one picture....but I don't.

Disclaimer: I have a serious love of muffins. Don't ask me why! I love them though. I love that they are just the right size, that you can have so many kind, filled, coated, chocolate, healthy, mini, jumbo, you get the idea. They are just fun!

Brown Sugar Muffins: bring back so many great memories for me. My sisters, brother and I would stay home most Friday nights before we were "cool enough" to go out or not "cool enough" to go out and I was the appointed cook. The menu usually consisted of tuna casserole, peas, (my personal favorite) and brown sugar muffins. Everyone who has had these loves these!! They are yummy, they got me through my pregnancy with Hailey. They were the only thing that wouldn't make me sick. They are great at breakfast or with meals or with anything! The only thing I haven't tried to do with these, is freeze them....hmmmm? If you want to be really evil, you can dip them in butter and cinnamon/sugar mixture. Why not go all the way every once in awhile?!
Brown Sugar Muffins
½ c. melted butter
1 c. brown sugar
1 egg
1 c. milk
¼ t. salt
1 t. vanilla
2 c. flour
1 t. soda
Mix, but just until blended. The trick with muffins is you don't want to overmix or they will be pointy on the top and not as soft. Spray muffin pan.
375 for 20 min.

Enjoy!! They are so great. I hope you will try them and let me know what you think. Any variations? Like it? Hate it? Let me know and maybe we'll see you next Monday, if you are a muffin lover!!

So I'm a total sucker for good food and even more good food with a story! Heather-I think you're completely cool, but glad you hung out at home to perfect these babies! Can't wait to try them.
Best of luck with the blog, I know I'll be checking in on you...
Happy Crafting.

Monday, August 1, 2011

Meet My Friend...Sarah from Scissors & a Whisk!!!

I am really excited to introduce you to one of my bloggy-buddies. She's been with me from pretty much the get-go of Craft Goodies. She is a wonderful cook, a new bride, new "official" teacher, and just a great person! Please meet Sarah from Scissors and a Whisk! ...

I am so excited to be doing my very first guest post, and I'm even more excited that it's with Craft Goodies. Some of you may or may not have remembered, but Wendy and I teamed up together to do the Re-Vamped Valentine Exchange. I consider Wendy a good bloggy friend, so I am more than thrilled to be here with y'all today.

I'd like to share this absolutely delicious peanut butter brownie recipe. It does take a bit of time and dirty dishes to clean up, but it's well worth the effort. Trust me.


Peanut Butter Brownies
Yield: 16 brownies

For the Brownies:
1/2 cup + 2 tablespoons all-purpose flour
1/2 teaspoon salt
1 tablespoon dark unsweetened cocoa powder
5 ounces dark chocolate
1/2 cup unsalted butter, cut into 1-inch pieces
1/2 teaspoon ground instant coffee
1/2 cup + 2 tablespoons granulated sugar
1/4 cup packed light brown sugar
3 eggs, at room temperature
1 teaspoon vanilla extract

For the Peanut Butter Swirl:
1/4 cup (4 tablespoons) unsalted butter, melted
1/2 cup powdered sugar
1/2 cup+ 2 tablespoons creamy peanut butter
1/4 teaspoon salt
1/2 teaspoon vanilla extract

1. Preheat the oven to 350 degrees F. Butter the sides and bottom of a 9×9 -inch glass or light-colored baking pan.

2. In a medium bowl, whisk the flour, salt, and cocoa powder together.

3. Put the chocolate, butter and instant coffee in a large bowl and set it over a saucepan of simmering water, stirring occasionally, until the chocolate and butter are completely melted and smooth. Turn off the heat, but keep the bowl over the water and add the sugars. Whisk until completely combined, then remove the bowl from the pan. The mixture should be room temperature.

4. Add eggs to the chocolate mixture and whisk until combined. Add the vanilla and stir until combined. Do not overbeat the batter at this stage or your brownies will be cakey.

5. Sprinkle the flour mixture over the chocolate mixture. Using a rubber spatula (not a whisk), fold the flour mixture into the chocolate.

6. Pour the batter into the prepared pan.

7. In a medium bowl, whisk together all of the peanut butter swirl ingredients. Using a spoon, place dollops of the peanut butter mixture all over the top of the brownie batter. Using a butter knife, swirl the chocolate and peanut butter, running the knife crosswise and lengthwise through the batters.

8. Bake in the center of the oven for 30 minutes, rotating the pan halfway through the baking time, until a toothpick inserted into the center of the brownies comes out with a few moist crumbs sticking to it. Let the brownies cool completely, and cut into squares and serve.

9. Store at room temperature in an airtight container or wrap with plastic wrap for up to 3 days.
(Recipe from Brown Eyed Baker)

Grab a glass of chocolate, and enjoy!

Can you see why I'd ask Sarah to help me out while I'm gone? Don't those look just amazing! You will find so many more super yummy goodies to try on Sarah's blog.
If your sweet tooth is as big as the ones in my house you're going to want to check it out-
Thanks again Sarah!!!
Happy Munching.

Monday, June 20, 2011

Peach Melba Ice Cream Cake!!!

Summer officially starts this week!
 (Although I am positive it found Texas early!!!)
 
This is one of my favorite summer desserts.
Super easy, quick to put together and it requires no baking to heat up the house.
Perfect, hope you enjoy it as much as we do...


Peach Melba Ice Cream Cake
Serves 8     20 minute prep + 5 hrs of chill time
1 ring shaped angel food cake (about 13 0z)                                1 pint frozen raspberry sherbet, slightly softened
¼ C raspberry pie filling
FRUIT TOPPING:
2 med. sized fresh peaches, cut into small chunks      1 C fresh raspberries          ½ C raspberry pie filling
1.       Place the cake, top side down, on a plate. Using a long serrated knife, slice a ½ inch layer from the top of the cake, lift the slice off in one piece and reserve.
2.       Using a small serrated knife, cut a trench in the cake ½ inch in from the inner and outer edges to within a ½ inch from the bottom. Carefully remove the center without breaking through the bottom or sides.
3.        Spoon 1 cup of the sherbet into the trench. Spread evenly with the back of a spoon, around the trench. Drizzle with the pie filling and top with the remaining sherbet. Replace the reserved cake top onto the cake and gently press down.
4.       Freeze for 1 hour, then wrap loosely and freeze for at least 4 hours, or overnight.
5.       Make the topping: In a med. bowl, gently mix the peaches, raspberries, and pie filling.
To serve, remove the cake from the freezer and invert it onto a serving plate. Spoon the topping into the center and serve right away.


*I added about a cup of blueberries to the fruit mix cause everything is better with a blueberry on it!
 

Monday, May 16, 2011

Birthday "Fishes" and {Easy} Cream Cheese Frosting!

Last week was the week of a million cupcakes!
 I think by week's end I was up to 10 dozen, that 's a lot of cupcakes...
these were my favorites of the collection.
My "summer birthday" gal was celebrating her special day and wanted fish cupcakes.


Thanks to circus peanuts, peanut butter and mini m&m's, and apple jacks we ended up with two dozen little swimmers!
(Decorating Ideas via "What's New, Cupcake?")
I added a little flag to each cupcake that read "Happy Birthday Fishes Ashlyn!"
They went over very well, went together pretty quick, and caused me to find a great
"faux" cream cheese frosting.
 
I was in a bit of a hurry and realized I was out of powdered sugar to finish the frosting-no time to hit the store. I did have a can of this...


I'd heard that if you add a tsp of vanilla to a can of frosting it helps it to taste not so out-of-a-can.
So I added 2 and a brick of cream cheese, whipped it all together and WOW!
It was good! Super creamy with just that little bite that cream cheese frosting has.
I may never make the real stuff again!

Hope your week is off to a great start, happy munching!


Thanks to those of you that have shared your recipes! We've had so much fun trying them, I've even shared a few with my friends-they think you're all geniuses!!!!


Monday, March 14, 2011

Irish Stew and Shamrock Milkshake Cupcakes...

Monday Munchies...
 
My girls are all out of school this week for Spring Break so needless to say, we need a few things to keep us entertained. 
 With St Patrick's Day on the calendar it will be a week of some fun green crafting and good eating!
 We aren't real big on corned beef, so it will be beef stew instead with colcannon (smashed potatoes with cabbage) and for dessert, Shamrock Milkshake Cupcakes. YUMMY!
 
Braised Irish Stew and Colcannon
 
Recipe from allrecipes.com

Ingredients

  • Irish Stew:
  • 1 tablespoon vegetable oil
  • 1 (3 pound) beef chuck roast, trimmed of fat and cut into 1/2-inch cubes
  • 2 tablespoons all-purpose flour
  • 1 cup coarsely chopped onion
  • 1 cup coarsely chopped carrot
  • 1 (12 fluid ounce) can or bottle dark beer
  • (We don't drink alcohol at my house so I substitute beef broth)
  • 2 bay leaves
  • 1 teaspoon dried thyme
  • 1 teaspoon salt
  • 1/2 teaspoon ground black pepper
  • 2 cloves garlic, minced
  • 2 tablespoons Worcestershire sauce 
Calcannon:
3 slices bacon
2 pounds russet potatoes, peeled and cut into chunks
2 cups thinly sliced cabbage
1/4 cup milk, warmed
2 tablespoons butter
1/2 teaspoon salt
1/4 teaspoon ground black pepper
2 tablespoons minced fresh parsley

Directions

  1. Preheat oven to 325 degrees F (165 degrees C).
  2. Heat the vegetable oil in a large Dutch oven over medium-high heat until very hot, and brown the meat in 2 batches, stirring to brown the cubes on all sides. Return all the meat to the Dutch oven, sprinkle with flour, and stir lightly to coat the meat with flour. Stir in onion, carrots, dark beer, bay leaves, thyme, 1 teaspoon salt, 1/2 teaspoon pepper, garlic, and Worcestershire sauce. Bring the mixture to a boil, and cover.
  3. Place the Dutch oven into the preheated oven, and cook for 45 minutes; uncover, stir the stew, and cook until the beef is very tender and the liquid is reduced by half, about 45 more minutes.
  4. Place the bacon in a large, deep skillet, and cook over medium-high heat, turning occasionally, until evenly browned, about 10 minutes. Drain the bacon slices on a paper towel-lined plate. Crumble the bacon and set aside.
  5. About 30 minutes before the stew is ready, make the colcannon. Place the potatoes into a large pot and cover with salted water. Bring to a boil, then reduce heat to medium-low, cover, and simmer until tender, about 20 minutes. Drain and allow to steam dry for a minute or two.
  6. Place the cabbage into a microwave-safe bowl, and add 1 or 2 tablespoons of water. Cover and microwave on High for about 2 1/2 minutes; uncover (watch out for steam) and stir the cabbage. Cover and microwave for about 2 1/2 more minutes, until the cabbage is slightly tender but not mushy. Drain excess liquid, and set the cabbage aside, covered.
  7. Place the potatoes into a large bowl, and add milk, butter, 1/2 teaspoon of salt, and 1/4 teaspoon of pepper. Beat the potatoes with an electric mixer until smooth and creamy. Stir in the cabbage, crumbled bacon, and parsley until well combined.
  8. To serve, place a scoop of colcannon onto a plate, make a hollow, and fill with braised beef stew.
Shamrock Milkshake Cupcakes

Shamrock Milkshake Cupcakes
Recipe from Better Homes & Gardens

Prep: 50 minutesBake: 15 minutesCool: 45 minutesStand: 30 minutes
 
Ingredients:
4    egg whites
2  cups  all-purpose flour
1  teaspoon  baking powder
1/2  teaspoon  baking soda
1/2  teaspoon  salt
1  cup  buttermilk or sour milk*
1/4  cup  green creme de menthe**
1/2  cup  shortening
1-3/4  cups  sugar
1  teaspoon  vanilla
1  recipe  White Chocolate Frosting
 Green food coloring

Directions

1. Allow egg whites to stand at room temperature for 30 minutes. Meanwhile, line twenty to twenty-two 2-1/2-inch muffin cups with paper bake cups. In a medium bowl stir together flour, baking powder, baking soda, and salt. In a 2-cup glass measuring cup combine the buttermilk and the creme de menthe. Set aside.
2. Preheat oven to 350 degrees F. In a large mixing bowl beat shortening with an electric mixer on medium to high speed for 30 seconds. Gradually add sugar, about 1/4 cup at a time, beating on medium speed until light and fluffy. Beat in vanilla. Add egg whites, one at a time, beating well after each addition. Alternately add flour mixture and buttermilk mixture to shortening mixture, beating on low speed after each addition just until mixture is combined.
3. Spoon batter into prepared muffin cups, filling each about two-thirds full. Use the back of a spoon to smooth out batter in cups.
4. Bake for 15 to 18 minutes or until tops spring back when lightly touched. Cool cupcakes in muffin cups on wire racks for 5 minutes. Remove cupcakes from muffin cups. Cool completely on wire racks.
5. Divide White Chocolate Frosting between two bowls. Tint one portion with green food coloring. Spoon each frosting into a pastry bag fitted with a large star tip. Pipe white and green frosting onto tops of cupcakes to resemble four-leaf clovers. Makes 20 to 22 (2-1/2 inch) cupcakes.
White Chocolate Frosting: Allow 1 cup butter, cut up, to stand at room temperature for 30 minutes. In a large mixing bowl place 6 ounces white baking chocolate with cocoa butter, chopped; set aside. In a small saucepan heat 1/3 cup whipping cream just until simmering. Pour over white baking chocolate; let stand, without stirring, for 5 minutes. Stir until smooth; let stand for 15 minutes. Gradually beat butter into melted white chocolate mixture with an electric mixer on medium to high speed, beating until combined. Gradually beat in 1-1/2 to 2 cups powdered sugar until frosting reaches piping or spreading consistency. Makes 3-1/2 cups.
*Test Kitchen Tip: For each 1 cup sour milk, place 1 tablespoon lemon juice or vinegar in a glass measuring cup. Add enough milk to make 1 cup total liquid; stir. Let stand for 5 minutes before using.
**Test Kitchen Tip: If you prefer not to use creme de menthe, substitute a mixture of 1/4 cup milk, 1 teaspoon mint extract, and several drops green food coloring. 


Monday, February 28, 2011

Peanut Butter & Jelly Cupcakes from Simple Sweetness!

Hi Everyone!  I'm Leslie from Simple Sweetness.

Simple Sweetness

Wendy has been kind enough to let me guest blog today to tell you about a yummy recipe I made.
Peanut Butter & Jelly Mini Cupcakes.
Of course you can make full size cupcakes with this recipe too.

Supplies:
*Yellow or White Cake Mix & Ingredients to Make Mix
*Vanilla Frosting
For the 5 dozen Mini Cupcakes I made, I used almost 2 cans of Vanilla Frosting
*Creamy Peanut Butter
*Jelly
*Filling Tip
*Decorating Tip
*Mini Cupcake Liners
Not everything is pictured here, sorry!

I first made the cake mix and lined my mini cupcake pan.  Then popped the pan in the oven.  I followed the box directions for oven temp and cooking time. 
FYI: Because I made mini cupcakes, they took less than the 20 minutes for full size cupcakes.  Just keep an eye on yours while they bake.

 I used my new Dessert Decorator Plus for filling and frosting the cupcakes.
I bought mine for $14.99 at Michael's.  Well worth the $15 because it had a filling tip and the decorating tips.  Plus you just wash out the tube, no messy frosting bags, no frosting coming out the bottom.

Filled with Grape Jelly. 

While I was baking and waiting for the cupcakes to cool, I mixed my Peanut Butter Frosting.

I took the lazy easy way out.  I just used vanilla frosting and mixed peanut butter into it.  There are tons of from scratch peanut butter frosting recipes on the internet so google that if you want to do it homemade. 
If you go the method I used, melt your peanut butter in the microwave for 15 seconds.  I had to do mine another 10 seconds, just be careful because you can burn the peanut butter.
I mixed in about 1 tablespoon of peanut butter at time until I got the right flavor.  Don't worry about doing too much or too little, mix in until you have the peanut butter flavor you want.
I did about 3 tablespoons to 1 can of Vanilla Frosting.


 Filling the cupcakes were super easy with my dessert decorater.  I let the cupcakes cool for about 5 to 10 minutes.  These being mini cupcakes, they cooled down super fast.  With larger cupcakes you might have to wait a bit longer.

  The directions said to insert the fill tip about 1 inch but as there were mini cupcakes, I didn't quite go down that far.  These were the first ones I filled and about halfway through I learned that if I pulled the plunger back a bit before I removed the tip from the cupcake then it wouldn't leave the bubble of jelly at the top you see in the picture below.  The ones with no jelly on top have not been filled yet. 

 The bummer about having only one Dessert Decorater tube is that I had to wait for all 5 batches of cupcakes to cook, cool and fill with jelly before I could switch over to my Peanut Butter Frosting.

I'm not a great froster so I tried to do a smooth "bubble" or "dot" of frosting.  To do this, hold your tube at a 90 degree angle in the center of your cupcake and frost until you have the size frosting you desire.  I think if I had backed off the tube a little before removing I wouldn't have had such a wispy tail on the end of the cupcakes.

Ta Da!  Peanut Butter & Jelly Cupcakes.

They are just like they sound, a sweet peanut butter & jelly sandwich in cupcake form.
  Delicious!


Hey C.G. friends, just a quick note from me-
My girls and I  made these over the weekend, Leslie isn't kidding when she says "DELICIOUS". They were so yummy and my girls had a blast stuffing the centers with jelly!

Thanks so much Leslie for sharing  your goodie with us! Happy Munching to you all-

Monday, February 21, 2011

Strawberries on My Mind...

Monday Munchies...
I am having a serious problem.
One I can't seem to get away from-I have been crazing strawberries like no tomorrow!
{NO, not preggers, I think I'm just ready for summer!!!}
I was enjoying some alone time in the garden center at Lowe's Saturday {yes, I really do just hang out at Lowe's when I'm alone!} and ran across all the new fruit and veggie plants.  
I adopted 30 of the little strawberry beauties and came home a happy gal!
 
I am clearly not the only one in this predicament!
So many things to try once my babies are full grown...
 
{just because it's who I am, I go to dessert first}
The Blackberry Vine
 shares the recipe for this delicious looking piece of heaven!
Yeah, I'm thinking this will for sure be my b-day cake this year...
And how about these?
My husband is the only non-strawberry lover in our house but even he wouldn't turn these down.
Why? Because the are cake-pops! Check out the how to's at
 Cute As A Fox
 
These babies are calling my name! {LOUDLY}
Dark Chocolate cupcakes and Strawberry Meringue Butter cream frosting!
My mouth is watering at the title, you can find these recipes at
Food, Folks, and Fun
 
And this is my favorite strawberry pie ever!
Strawberries are on sale this week, so yep, this is our FHE treat tonight...
Picture of Strawberry and Cream Pie Recipe
 
Really, can Paula Dean do wrong? This is so easy and SOOOO yummy.
The recipe can be found HERE.
 
...and just in case that's not enough, check out this "BERRY SWEET" party at
 Giggles Galore
This is one awesome momma!
{and my kind of party}
 
 
So go grab a tub of cool ship and some red-ripe strawberry goodness and have a delicious day!
Happy Munching!


Monday, February 7, 2011

Chicken Fajita Tortilla Soup & Cupcakes with a Heart!

Monday Munchies...
My very sweet neighbor fed me dinner the other night-
{she was watching my daughter for me and when I went to get her, my neighbor had just finished making this soup and insisted I try a bowl...}well it ended up being a bowl for me and 2 for my daughter, an hour of fun conversation, and a traded recipe.
It's a Rachel Ray and it was fantastic! Going to try it on my own later this week...
Chicken Fajita Tortilla Soup
Picture of Chicken Fajita Tortilla Soup Recipe
photo via Food Network

Ingredients

  • 2 tablespoons extra-virgin olive oil
  • 2 packages chicken tenders, 1 1/2 to 2 pounds
  • 1 tablespoon coriander, a palm full
  • 2 tablespoons chopped fresh thyme leaves, 5 to 6 sprigs
  • Salt and freshly ground black pepper
  • 1 large onion, quartered and thinly sliced
  • 1 large bell pepper, quartered and thinly sliced
  • 1 jalapeno, seeded and thinly sliced
  • 1 (28-ounce) can fire roasted diced tomatoes
  • 1 quart chicken stock
  • 1 bag white corn tortilla chips
  • 1 cup shredded pepper Jack or sharp white Cheddar
  • 1 ripe avocado, diced
  • 1 lime, juiced
  • 4 scallions, chopped
  • Handful fresh cilantro leaves or fresh flat-leaf parsley, chopped

Directions

Heat a large skillet with extra-virgin olive oil, 2 turns of the pan, over medium-high heat. Add chicken, begin to brown 4 minutes, add coriander, thyme, salt and pepper, to taste, onions, bell pepper and jalapeno, season with salt and pepper, to taste. Cook 8 to 10 minutes, stirring frequently. Add tomatoes and stock, heat through.

While the soup is working, lightly crush some tortilla chips and divide among 4 bowls. You need a couple of handfuls per bowl. Top the chips with a little cheese. Toss the avocado with lime juice. Top the chips with ladles of soup. Garnish soup with avocado, scallions and cilantro or parsley.


With Valentine's Day quickly approaching I've been on the hunt for a fun treat for my girls' classes.
I think I found the one...


How CA-UTE are these? And they look SOOOO yummy!
Alison's Wonder Scraporium
has the recipes for the cupcakes and frosting, {as wells links to print them!}
and a beautiful picture tutorial of the entire baking process, start to tasty finish.
My kids are going to think I'm so cool...

Happy Eating!

Monday, January 31, 2011

Birthdays and Buttercream Frosting!

Monday Munchies...
 
My sweet little #4 daughter turned 5 over the weekend. We had a lot of fun celebrating her birthday together, and then I secretly cried in the bathroom at the thought of this sweet little thing heading off to kindergarten in a few months! Why do they have to grow up?
Anyway, instead of a main dish and dessert recipe I'm going straight to the cake!
 
This has become the standard b-day cake at our house, 4 layers decorated in the colors and flavors of the birthday-ee. Halli chose a "cookies and candy" cake this year, so that's what she got.
I am not by any means a great cake decorator,  but I enjoy the adventure and so do my girls. I've learned along the way that your frosting can completely make or break the cake so today I share my very favorite frosting recipe...

Classic Buttercream Frosting Recipe:
Ingredients:
1 cup butter (2 sticks or 1/2 pound), softened
3-4 cups confectioners (powdered) sugar, SIFTED
1/2 teaspoon table salt
1 tablespoon vanilla extract
up to 4 tablespoons milk or heavy cream
Directions:
Beat butter for a few minutes with a mixer on medium speed.  Add 3 cups of powdered sugar and turn your mixer on the lowest speed (so the sugar doesn’t blow everywhere) until the sugar has been incorporated with the butter.  Increase mixer speed to medium and add vanilla extract, salt, and 2 tablespoons of milk/cream and beat for for 3 minutes.  If your frosting needs a more stiff consistency, add remaining sugar.  If your frosting needs to be thinned out, add remaining milk 1 tablespoons at a time. 

Enjoy!

Thursday, January 27, 2011

More Threads and Thrills...Rolled Rosette Pillow

*** 9/09/2012 I just received a comment on this post that I can't decide if they were joking or not. It was kind of mean, but either way, they asked that I let you know that this project isn't quick. It took me several hours to complete one pillow so if you need to have this done in an hour here you go...it's not going to happen, sorry. But then too, I did mention that in this post. I removed the comment, it makes me sad, hopefully your pillow will make you happy!***

I've been pining for pillows lately, today I finally got around to making a few. I am elated and tickled pink with them, so much so, I feel the need to share the story of their creation...

In my efforts to come up with a few examples for my Valentine exchange, I found myself at my local Goodwill. I gathered a few fantastic treasures and headed to the register to pay. Then an odd and super terrific thing happened...
The cashier wrapped all of the glass items I purchased in white t-shirts!
What? Seriously? So much better than old newspaper! 


I got home, unwrapped everything, and sat staring at a pile of white t-shirts. I felt super guilty at the thought of tossing them, but what to do?
Then the light bulb started glowing. I ran across a beautiful pillow last week that was covered in crocheted flowers-I wanted one badly.
Two problems though, one the pillow was $70 and  two, I don't crochet.
I thought I had solved the problem by resolving to make the flowers from ribbon, would have worked but would require A LOT of ribbon. So what if I cut up the t-shirts instead?
OH YEAH!
Thank you Goodwill lady!


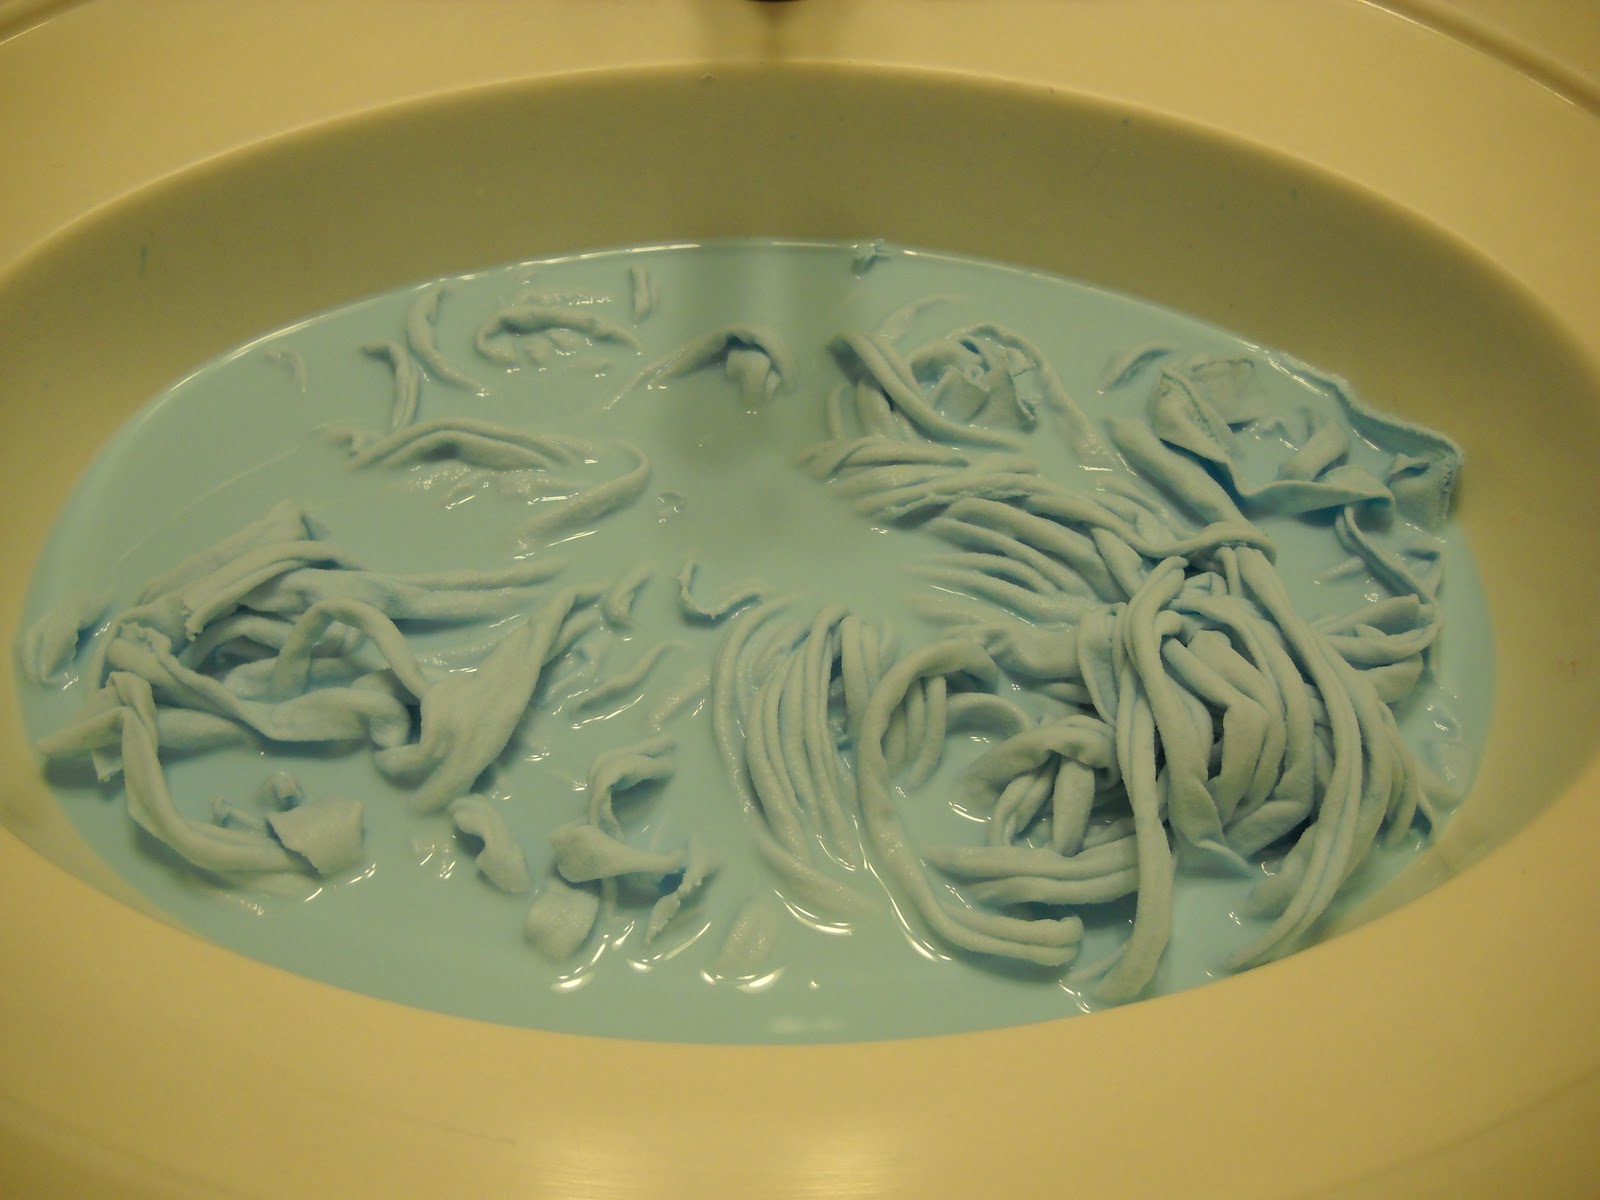
 I tore the t-shirts into long strips about 1 1/2 inches wide. The nice part was because I tore instead of cut, the edges rolled on their own, saving me a ton of time.
I gave the strips a bath in a mix of warm water and baby blue paint.
{I knew this would last due to the countless #of shirts I've ruined while painting}

 I rinsed the strips out, gave them a twist to remove the water and threw them into the dryer.
Then I started rolling, and rolling, and then rolling a little more. Once I had the flowers rolled and stuck together, I sewed them onto a pillow square.
And ta-da...
...my baby was finished!
Just in case you're wondering, I used approx. 60 rosettes per side for 3 pillows, and I used 12" pillow forms.
The ironic part, I was trying desperately to finish these to enter them in a contest. They took a bit longer
(like several hours...) than I thought they would, and I missed the link!
But that's okay cause these babies rock!
And thanks to the awesome Goodwill  lady, only cost me the price of the pillow forms...

Happy Crafting!


I've linked this post to these great sites:
My Romantic Home
Someday Crafts
Tatertots and Jello
Bubbly Nature Creations
Fast Daze
I {HEART} Naptime


Monday, January 24, 2011

Baked French Toast and Banana Crumb Muffins

Monday Munchies...

I will be the first to admit that my eating habits are really lousy.
I never eat "meals" until it's time for dinner, I kind of forget to eat,
and breakfast?
 I don't think I've had breakfast in the a.m. hours since elementary school ...unless, does a Coke Zero count?
{I do however, make sure my girls start off the day on a good note!}
But breakfast in the p.m....YES PLEASE!
It has to be one of my favorite ways to end a day.
 Here is one of our favorite breakfast for dinner meals...
 
 
Baked French Toast Recipe
Recipe and photo via Country Door Recipes
Baked French Toast
 
1 loaf of French bread
3 eggs
1 cup of half and half
1 cup of milk
1 Tbsp. vanilla extract
1 tsp. nutmeg
1 tsp. cinnamon

Cut the French bread in to 1 1/2" slices and place in a baking dish, sprayed with a nonstick spray. Mix all of the above ingredients in a large bowl (until fluffy) and pour over bread evenly. Cover with plastic wrap and refrigerate overnight.
{I make it in the morning after the girls are gone to school and then keep it in the fridge all day}


For topping:
1/2 cup brown sugar
1 Tbsp. corn syrup
1/2 cup chopped walnuts
1/2 stick (1/4 cup) of melted butter

Mix all the ingredients well, and refrigerate as well.

The following morning, thaw out the topping or place in the microwave for 30 seconds to soften. Spread over each piece of French bread, preheat oven to 350° F and bake for 40 minutes. Serve hot with pure maple syrup.
 
No time to cook in the morning?
Bake these up the afternoon before and you're ready for the day...
Banana Crumb Muffins
This recipe was linked up to my first T.G.I.F. party, and I couldn't wait to try it. Muffins are a BIG deal at my house, {we call them breakfast cupcakes} and these didn't disappoint!
 
You can find the recipe and directions at It's All In My Head!
Thanks Stef!
Happy Eating...
Related Posts Plugin for WordPress, Blogger...