Hi there! And welcome to Craft Goodies. I'm thrilled that you've stopped by and hope you find something here that makes your visit a great one...
Showing posts with label great gift ideas. Show all posts

Monday, September 19, 2011

It's SUPER SATURDAY time!!!

It's (one of )my MOST favorite time of the year!
SUPER SATURDAY SEASON!!!
If you are by chance unfamiliar with what I believe should be an official holiday, Super Saturday is a wonderful day of crafting, chatting, eating, learning, friends, laughing, and pure joy that is hosted by the Relief Society at my church.

It really is just a "super" fun day to hang out with friends doing all kinds of girl things, and who couldn't use one of those? So what will we be spending our special day creating?
Let me show you...

(This post is being shared with the super fab gals from my ward, so if that's you,
please read the descriptions carefully and feel free to contact Dustie or myself with any questions you might have!
Also please note that we have chosen projects that we feel are VERY USER FRIENDLY, we don't want anyone to feel like you can't make any of these projects. If you have a question about something please ask, also we will be there all day on the 8th to help where ever needed.)

**If you choose a project that allows you to bring your own paper/paint contact me for the pricing difference.

For those of you not in my ward I will provide links where appropriate to the ideas we were inspired by and too, feel free to ask any questions you might have...

Dress Form Hairbow Holder
Inspiration site: Lil Zoe

Cost: $18
Includes: Wood Form, paper to cover, tulle for skirt, all ribbons and flowers, mod podge, brushes, and paint for the back.
You supply: glue gun and scissors if you have them

Count Down Blocks

Cost: $10 per set
Choose between Days 'til Christmas
or
double-sided Days to Vacation/Days until Back-to-School
Includes: blocks and base pieces, sandpaper, paint and brushes, pre-cut paper squares and vinyl numbers, labels, mod podge, and we will have ink pads available for your use.


Family Chore Chart

Cost: $12
(Additional frames can be added for $1 per frame)
Choose between Black or Brown base/papers
**or supply your own papers
Includes: base board, pegs, hanging chalkboard tags, oval label cutout and flourishes, 5 frames, 5 clips, all paper and embellishments including ribbon, paint and brushes, mod podge.

You supply: glue gun and scissors/paper cutter if you have them

Count Your Blessings Board
Lil Luna

Cost: $15
Choose between Black or Brown paint/papers
**or supply your own
Includes: Base board, 4 picture boards, paint and brushes, papers, mod podge, vinyl lettering, all ribbons, clips, and embellishments, and ink pads will be available for your use.

You supply: glue gun, scissors if you have them

Temple Block/ Mission Block
Temple Blocks via Lil Luna  Mission Bliocks via me!

Cost: $3 ea
Choose from Houston or SLC Temple
 with either "I'm Going There Someday" or "I Love To See The Temple" saying.

Missionary Tag for Sister or Elder, photo reads "I Hope They Call Me on a Mission"

Includes: Block, paint, snad paper, photo, mod podge, embellishments.


Family Rules Board
Vinyl provided by Under My Umbrella

Cost: $15
Choose from Black or Brown Paint **or bring your own paint
VINYL ONLY AVAILABLE IN WHITE
Includes: base board, paint and brushes, sand paper, vinyl lettering, spray sealer

Initial Pillow Covering

Cost: $3
Choose from brown or black paint
Includes: fabric pillow case, stencil, paint, ribbon, needles and thread 
Be sure to leave your initial choice and ribbon color.
*does not include pillow form

Holiday Blockheads
Well Good on Etsy

Cost: $10
Includes: full kits-everything you need will be there!

You supply: glue gun and scissors if you have them
(if you have any scrap pieces of paper you'd like to get rid of, this is a great way to do it)

JOY Word...of the Month Kit
Well Good on Esty
Cost: $8
Includes: letters, bell, and base piece, paper, bow, paint, brushes, mod podge, ink pads will be availablefor you to use.

You supply: glue gun and scissors if you have them

Family Yahtzee Game
The blog where I originally found this idea, The Thrify Chick is no longer running but you can find other tutorials by searching "handmade Yahtzee games".
Cost: $7
Includes: storage box with personalized label, blocks, sand paper, score sheets and rules, numbers for blocks, paint and brushes, and mod podge.

You supply: scissors/paper cutter and pictures!!!
You need 5 copies of 6 different pictures (can be families, individuals, your dogs, stickers, whatever you want on your dice!) It would be helpful if you have your pictures cut down prior to coming as this is the longest step, they should measure 1.25 x 1.25 inches each.

Wooden Block Nativity Set

Cost: $4
Includes: 13 character blocks and the stable block, sand paper, clipart pictures, mod podge and brushes, 2 jumbo craft sticks and star cutout, ink pads will be available for you to use.

You supply: paper cutter/scissors and a ruler
**paint if you wish to paint the blocks versus leave them natural

30 Fast & Easy FHE Ideas...Bucket

Cost: $12
Includes: paint bucket, 30 individual lesson icons, typed lesson plans with binding, paper to cover and label for bucket.

How it works: Simply reach into the bucket and pick out an icon. Match the icon to the lesson plan and FHE away! Everything you need to pull off a successful, fast and easy FHE lesson is on the corresponding card-super fun idea for the kiddos!
(Whale= Jonah and the Whale, Play Money= Tithing, Baby in a Basket= Story of Moses, etc)

Initial Plaque
Signs by Andrea
Cost: $8

Includes: Base plank, large initial stencil, vinyl overlay, sand paper, paint, and brushes.
Be sure to leave the initial and name you want on each board!

Families are Forever Blocks

Cost: $12
Choose between black/gray (shown) or brown/blue papers and paint
**or bring your own

Includes: blocks, sand paper and paint, pre-cut papers, lettering, ribbons and embellishments, mod podge and brushes, ink pads will be available for you to use.
-the back ground paper on the top block will be lighter so the lettering will stand out more!

You supply: scissors and hot glue gun if you have them


Alright! There you go, hopefully a little something for everyone. A few things to remember,
sign ups/money should be turned in to Dustie by Sunday 9/25.
This is such a great time to invite non-member friends and family, or even your older kiddos so spread the word-
the more the merrier.
We are offering TWO FREE PROJECTS!
Come learn how to make( and take) a sweet little necklace
Then She Made
or hand sew a simple holiday project.

We'll have everything there for you, we just need you to show up.
For planning purposes there will be a sign-up sheet, please add your name if you think you might like to make one.
Limit two necklaces and one tree per person.


 And last, even if crafts aren't your thing there will be SEVERAL class available for you to attend to learn something new as well as a great lunch for you to enjoy.
So join us for a great, SUPER day-
Saturday, October 8, 2011.

Happy Crafting.


Wednesday, August 17, 2011

Ruffled Cinch Bag {Mini} Tutorial...Cutest bags EVER!!!


It's okay, take a minute and just enjoy the cuteness of it all! I still giggle every time I see my girls sporting one of these.
Best part???
Each bag cost me less than $1.50 to make.

So here's the story quickly...
Attended a Thirty-One Party and saw this...


Loved it, ordered it. OH! Happy me.
Had a trip to Sea World with my two super-cute nieces planned, thought "How cute would it be to have those little munchkins running around Sea World with their own little ruffled bag to tote a few goodies in?"

Loved the idea-so excited, got all the supplies needed...ran out of time before the trip to get them made...bad aunt and mom!
Did however get them made after we got home. Perfect for toting around our new friends...
Do you love the outfit? She's so in the I can dress myself phase...

Seriously, super easy, and the compliments we get! Makes me a happy "Yes, I made those," mama.

Here's the skinny on making one for your little munchkin:

Small piece of muslin to make the bag
*Mine were 20 x 14 inches

1 XL plain T-shirt for the Ruffles
*I bought X-LG t-shirts from my local Dollar Tree, one shirt easily covered one bag in the size I cut. I just bought a few different colored t-shirts and the girls picked their designs.

Matching ribbon for the ties
*I used about 8 ft of ribbon per bag

That's it! So let's make one of these cuties...
I checked out this tutorial
 to learn the basics of how to make a cinch bag.

 And made my bag...


From there, I cut the t-shirt into 2 1/2 inch wide strips. I cut the strips across the width of the shirt-from one side seam to the other, so that it made a great big loop. And NO HEMMING! 
 Hooray for jersey knit!


Then I marked out my guide lines on my bag (1 inch up from the bottom and then every 2 inches) and started sewing the loops into place...


I didn't pre-pull my ruffles, I just tuck the fabric up under my presser foot as I go-there is no rule that says you can't pre-make the ruffles, I'm just a bit lazy that way!

Keep adding those ruffles until you reach the top...


Thread your ribbons through the top of the bag and then sew them into place on the bottom of the bag.


Pack your bag, cinch it up, and you're on your way!


You can finish the top in a few different ways, in fact if you look really closely at this picture, you might notice that I finished three of the five bags in a different way.
{I didn't take any pics of them individually, sorry. I'll add some in in a bit.}

 I love how the pink one came out but it was by far the hardest-probably just me.
I cut a strip of pink 4 inches wide and folded it over the top of the bag being sure that when I started sewing I would be below the pocket that the ribbon would run through.
And then I ruffled.
 It was probably hard because I was so paranoid that I was going to sew my ribbon channel shut and then there would be no "cinch"!
I also had to cut a slit into each of the sides so that the ribbon could come out.

Method 2 (the purple bag) was just to add another ruffle right over the seam line of my ribbon channel. Easy, cute, but you can see the different color of the bag along the cinched up edge.

And Method 3 ( the white & coral bag) I like this one best overall. When making the bag, I left the top alone-I didn't sew a channel for the ribbon. Instead, I folded one of the long loops in half, long side to long side, and sewed the edges closed to form the channel.
I then sewed on all my ruffles, making sure the last ruffle lined up with the top edge of the bag.
I then sewed the channel piece onto the edge of the top ruffle, seams together, so that when the ribbon was threaded through, all you see is a matching, finished edge.

What ever you choose, have fun and enjoy your ruffles!
Happy Crafting.
 

You can find this post at the CSI Project Knock Off Challenge!
Visit thecsiproject.com

Wednesday, June 15, 2011

Father's Day Photo Gift Ideas!!!

Are you ready? Gift wrapped, ready to go? Cause Father's Day's a coming! And quick!
I have the hardest time with this holiday-I'm totally into homemade sentimental gifts and my husband is so not...
so I try to mix it up a bit, a little bit of feelings + a  little bit of purchased.
Win, win, right? (I hope so...)
This year I'm giving my dad and my hubster the same gift. It was quick, easy, fairly inexpensive, and I'm feeling good that they'll both like it.


I cut out the letters from a sheet of foam core board. Snapped a few quick pictures in the front yard. Used picnik to edit the pictures on-line. Sent them to my local Wal-Greens to have them printed.
Just have to go pick up the frames from Hobby Lobby and I'm done!
I printed out each picture individually and am putting them into a 5 slot matted frame.
I also added in the word "grand" for my dad's set...
 

Updated pictures and a gift! Hooray...

You might have seen this one before, but I thought it would work here too.

Photo Tic-Tac-Toe Game

I made this for my dad this past Christmas. Super easy, super sweet!
This is one of my girls favorite things to play when we're at my dad's, and my dad absolutely loves it too.
You can find the tutorial HERE!

Good luck with your gifts, enjoy and honor the dads in your life-
Happy Crafting!


Wednesday, May 4, 2011

Teacher Appreciation and Year End Gift Ideas (part 2)

All righty, here we go with:
Album # 2...the School House!
 

Here's what you'll need:

1/4 inch MDF or chipboard/thin card board
paint or paper to cover the school house, eaves, and bell
paper for the doors and name plate
Black ink pad
ribbon
2 buttons
fine tip sharpie
Glue dots
3 pieces of 12x12 inch scrapbook paper
*if you paper cover the school house you'll need mod Podge*

Finish the Covers...

Following the patterns, cut out all the pieces needed.
SCHOOL HOUSE FRONT COVER PATTERN
SCHOOL HOUSE BACK COVER PATTERN
SCHOOL HOUSE DETAILS PATTERN
* CLICK THE LINK. CLICK ON "FILE" ON THE FAR LEFT. CLICK PRINT.*
 
Paint the front and back covers red, all sides.
Paint the eaves, once dry, glue into place.
(Refer to picture)
Cut the bell, doors, and nameplate pieces. Distress edges with black ink, add additional details with the sharpie and glue into place.
Add a bow to the top of the bell and the buttons to the door.
Set the covers aside.
 
Assemble Pages...

Just a little after thought...you could use the page folding technique for either album (the fold out here, or the accordion fold from the Crayon Album) the covers are about the same size, either would fit! So go with the one you like best.


Fold each of the 12x12 sheets into fourths.
 

Then make 1 diagonal fold into each paper square.
 

Unfold all three papers and lay them side by side so that the diagonal fold is running straight up and down.
Over lap the bottom right square of page one with the bottom left square of page two.
It doesn't matter which one is on top, pick the paper you want showing and then glue them together.
It should look like this:

Repeat those steps with the second and third pieces of paper, over-lapping and then gluing.
You will end up with one continuous piece of paper that looks like this:

Fold the Pages:

Start with the page furthest to your left.
Using the diagonal fold as your guide, push the fold (B) toward square A.
Repeat with the second fold (C) pushing it in toward square A.
All of page one should sit on the glued square of pages 1 & 2. See 3rd picture above.


Turn the entire piece over so that the square you just folded is face down and furthest to your left.
Repeat the steps above using the diagonal fold as your guide to push in the folds.
You should end with the folded pieces filling the glued square of pages 2 & 3.


Turn the piece over again and repeat the folds.


You should end with a 6x6 inch square.
Right side up = backside of page 1 face up, back of page 3 face down .
Open end of folded pages closest to you.
(See above picture) 
To unfold it, grab it by the bottom right corner and pull back.

To glue the pages into the covers, refold the pages.
Center the folded paper square onto the back cover, then glue into place.

Add glue to the top piece of folded paper and then place school house cover on top-
line up the covers to be sure everything is centered!


Decorate the Pages:
 
You will have four 6x6 squares to fill, you can decorate the triangle folds too.
My first square is a chubby little hand print and signature.

The second was a fun year-end picture.

Square #3 was their diploma.
And square #4 a class picture.


Wahoo! Two albums down, a few baskets to go. These really are pretty easy to put together-let me know if you get lost anywhere in the directions...
 
Happy Crafting! 

Teacher Appreciation and Year End Gift Ideas...(part 1)

Once upon a time, I was a full time preschool teacher.


 One of my favorite times of the year was graduation. Okay, it was also one of the saddest, but I loved being able to look back and see the growth that my little buddies had made over the year.


I'm really big on making keepsakes with my little people, they are only little once! And graduation was no exception. I wanted something special that they could keep forever to remember the year that we had spent growing and learning and came up with these...
 
School House Diploma/Fold Out Album


...and Crayon Diploma/Accordion Album


I'm going to walk you through the crayons first...keep in mind that for a teacher gift, you might only want a few pages with a class picture, maybe some fun pics from throughout the year and maybe a special note...

My covers are cut from 1/4 inch MDF but you could easily substitute chipboard or thin cardboard.
Trace out the pattern and cut your pieces, you'll need two.
If you use wood, give the edges a quick sanding.
 COVER PATTERN
DETAIL PIECES PATTERN
*click the link. click on the "file" tab on the far left. select print.*


Finish the covers...

Trace the covers onto colored card stock.
Cut out the images and adhere them to the cover bases, ink the edges.
Trace the detail pieces onto desired color card stock, cut out, ink edges, and adhere onto crayon cover.
Add name to center oval-I used stickers!
Repeat the same process for the back cover. You can add the detail pieces if you'd like.


Assemble the pages next...
Determine the number of pages you want in your book, mine has 8.
Cut your page card stock to 6 long x 7 inch wide.
 Make a one inch fold on each page so that your page measures 6 inches square + 1 inch fold...


Lay the pages out so that the fold is on your right hand side. Glue the left edge of the second page onto the fold of the first page, being sure to line up all the edges and that the fold is UNDER the second page.

Front side up
Looking at the back side
 Repeat this same step until all pages are glued together.
 Cut off the "fold" on the last page.

Fold the remaining pages in a fan-like pattern, forward, back, forward, back, etc. until you get to your last page.

Center the first page onto the back of the front cover and glue into place.


Glue the last page to the inside of the back cover-be sure to center it.


Decorate your pages!

My first page is an info page that I had them fill out in the fall.
The second was their hand print made in the spring:

Hello! My name is ____________
I write it like this:

I am ____ yrs old. My favorite color is _______.
I like to play __________.
This is a picture of me:
*they drew a self-portrait here
(date info was taken)

The third page is a spring picture, the 4th was the same info page re-done in the spring:


The 5th page is a class picture, and the 6th was their diploma:


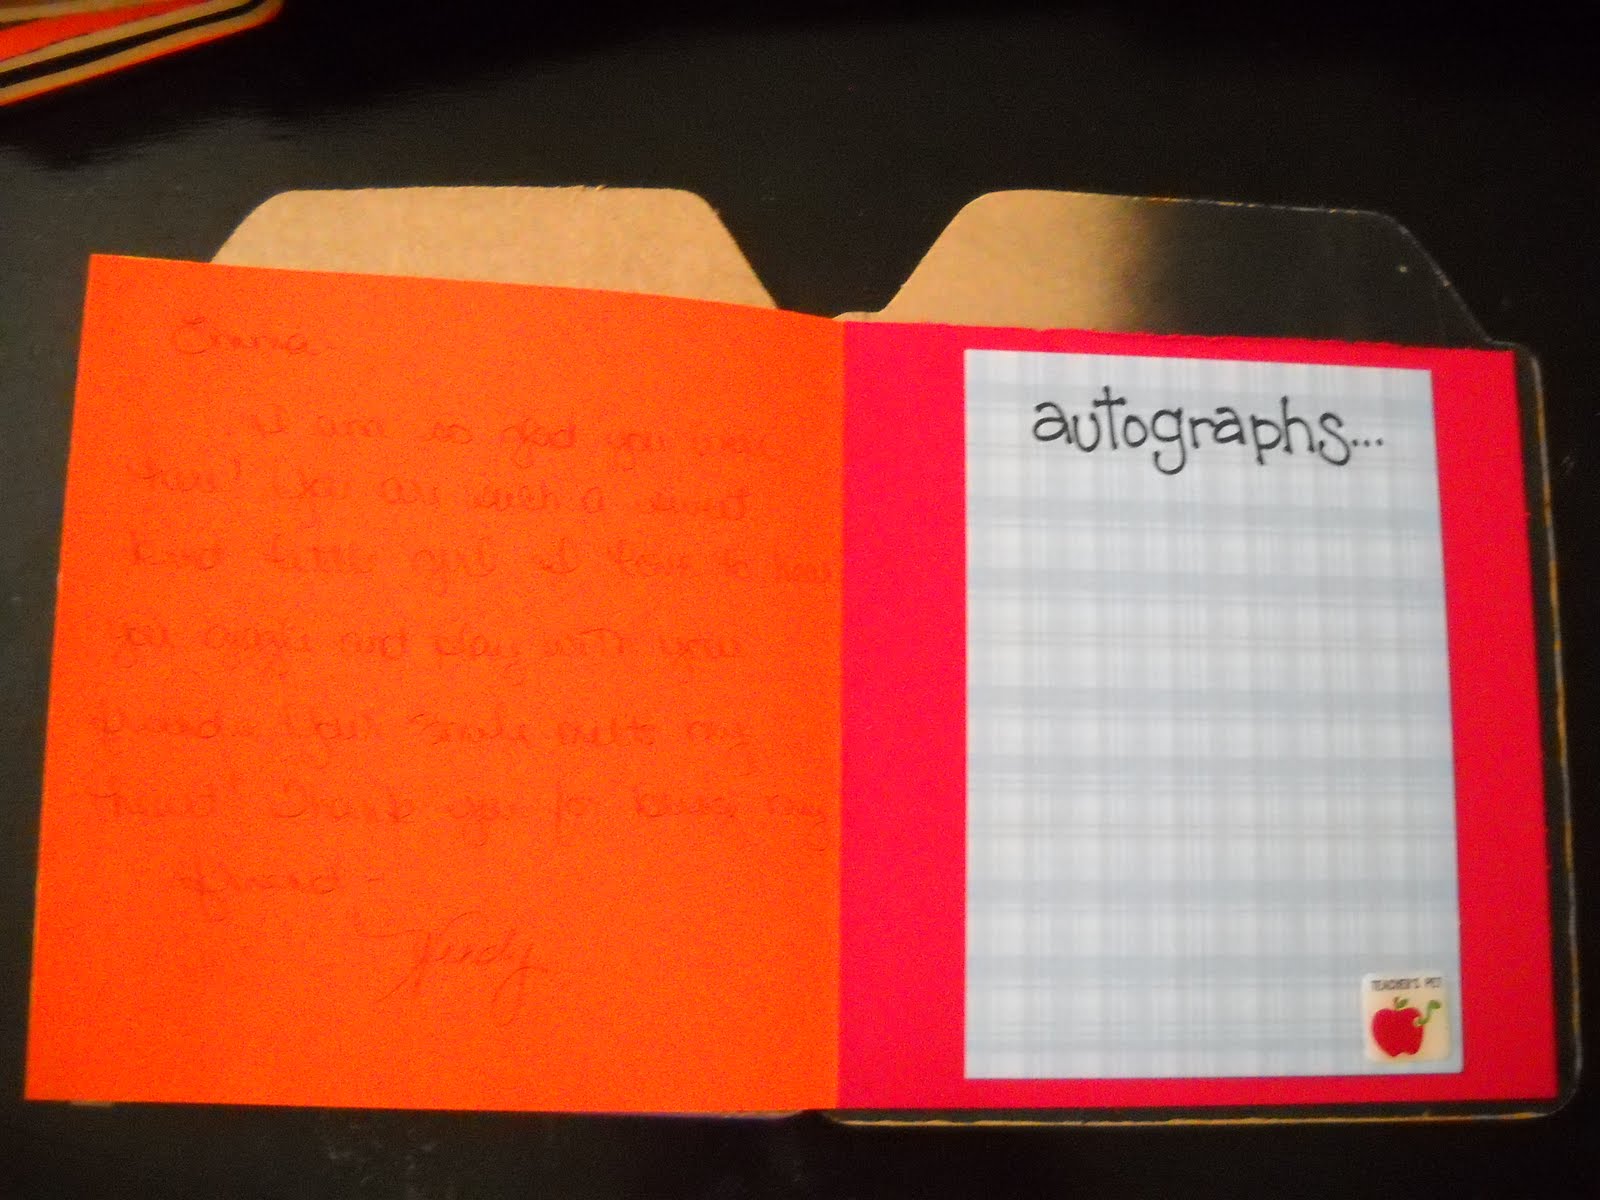
And the 7th page was a letter written from me to them, and last a place for auto-graphs!


There you go! You did it!

One very cute, very sweet little crayon album.
Wouldn't you just LOVE getting one of these?
Or better yet, seeing the look on your teachers face when you give them one!

PLEASE!!! Let me know if you have any questions. Thanks!

Happy Crafting...


Related Posts Plugin for WordPress, Blogger...