


If you didn't get a chance to visit the CSI Project last week for my guest post, no worries!
Here it is:
Hey there all you CSI friends!
Here it is:
Hey there all you CSI friends!
It's been a while since I've been here and I could not be happier to be back. My name is Wendy and most days, I can be found over at my little place in cyberspace:
Craft Goodies.

So why am I so happy to be here this week?
One, I LOVE this blog--so many fantastic ideas to be found and two, I LOVE pillows!!!
I love that they are so versatile, such an easy way to spice up a plain old chair or sofa, and can be anything from wild and crazy to completely personal. SO, let's get busy and make one!
I spied a pillow a few weeks ago at Hobby Lobby that I immediately wanted, I just didn't want to pay the $35 dollars for it so I set out to copy it.
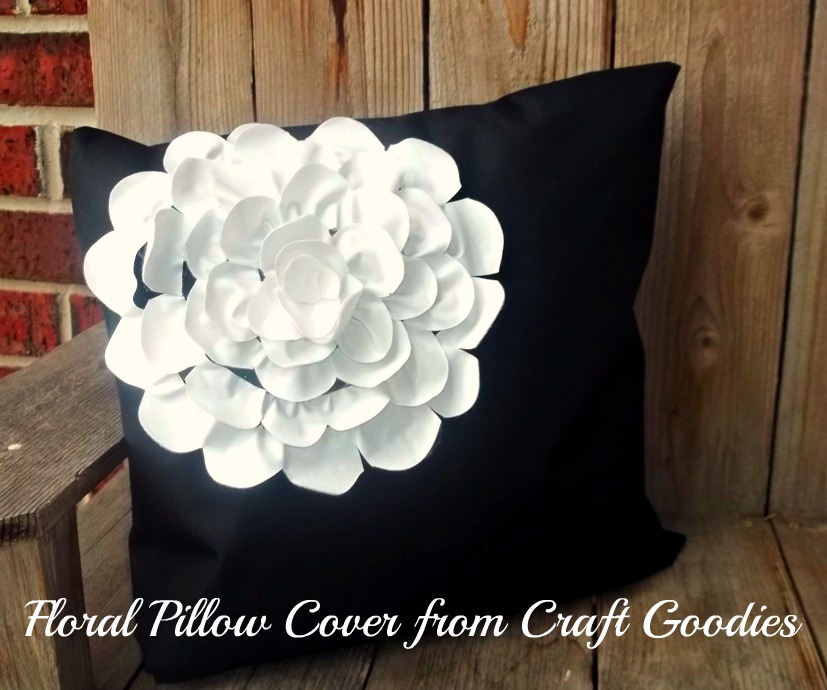
I couldn't be happier with how it came out.
{And it was so much less expensive to make.}
The key to making this pillow a stand out is to not use prints. The ones in the store were all solid, bright colors like hot pink, turquoise, lime green, etc, and then were paired with either a bright white or black flower.
Start with the pillow form size of your choice, your cover fabric, and contrasting flower fabric.

The pillows in the store used a suede type fabric for the flowers, because mine are going outside I chose felt-backed vinyl. I probably would have used this if I were using these inside anyway. It "puckered" just like the suede, will be super easy to wipe clean, and I don't have to worry about the edges fraying.
My cover fabric is also outdoor fabric so it won't fade or mold if it gets wet. Home decor fabric would make a good choice too.
I used an envelope style pillow case to cover the form. These are fast and easy, and make it super quick to change out your pillows.
You can find a good video tutorial on how to make one HERE.
**I measured and pinned out my casing, but didn't sew it together until the flower was on. This made it easier to sew the flower on without having to try and avoid sewing my pillow case shut!**
To make the flower cut the vinyl into 2 inch wide strips.
{I used a total of 3, so you don't need much fabric at all...}

Once you have your strips, go back and add a scalloped edge to each of them.

Pinning comes next. I used a soup bowl to give me a starting point. I pinned around the bowl really loosely, about every other petal.

Continue to spiral the petals toward the center, pinning as you go. the go back and sew the petals into place, catching the "puckers" as you go.

See the gaps between each layer? This made it super easy get in between each layer with my sewing machine. I used the machine to sew everything but the last two petals, they got fabric glue.
From there I finished up the envelope casing, stuffed in my form and sat back and smiled!

From there I finished up the envelope casing, stuffed in my form and sat back and smiled!

All in all, a yard of each fabric was enough to make two 14x14 casings and oodles and gobs of flowers--a 1/4 yd of vinyl would have been plenty.
I hope you like it as much as I do, and will give it a try. I can't wait to see all the submissions that come in this week, it's sure to be a mega-source of ideas and things to try!
And thanks too for letting me stop by today. It's always such a treat.
Happy Crafting.


No comments:
Post a Comment